The Ultimate Guide: False Lashes in 5 Minutes for a Natural Look

Achieving a natural look with false lashes in under 5 minutes is attainable with the right preparation, tools like lash glue and tweezers, precise application techniques, and careful post-application adjustments for seamless blending.
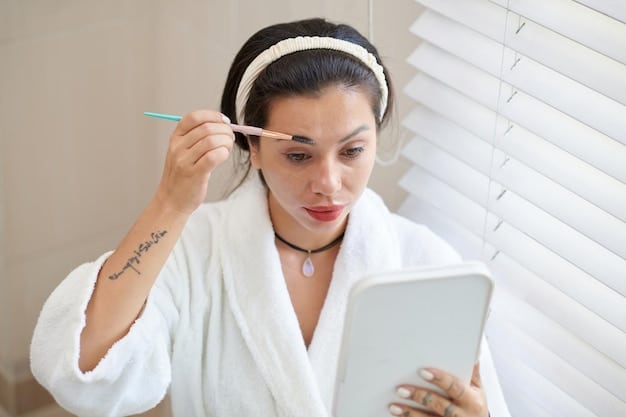
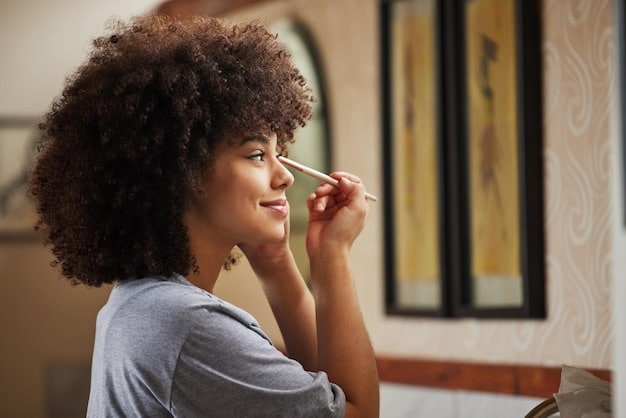
Want to enhance your eyes with the ultimate guide to applying false lashes: get a natural look in under 5 minutes? It’s easier than you think! This step-by-step guide will have you rocking stunning lashes in no time.
The Secret to Natural-Looking False Lashes
Many people shy away from false lashes, fearing they’ll look unnatural or over-the-top. However, the key to achieving a subtle, everyday look lies in choosing the right type of lashes and mastering the application technique.
Choosing the Right Lashes
Selecting the right lashes is crucial for a natural appearance. Look for lashes that are:
- Not too long: Opt for lengths that are close to your natural lash length.
- Not too dense: Sparse or wispy lashes tend to blend better with your own.
- Made of natural fibers: These lashes usually look more realistic than synthetic ones.
Consider trying individual lashes for an even more customized and natural finish. They allow you to add volume and length only where needed.
Essential Tools for Flawless Application
Having the right tools will make the application process much smoother. Here’s what you’ll need:
- False lashes: Choose a pair that suits your eye shape and desired look.
- Lash adhesive: A high-quality adhesive is a must for secure and long-lasting wear.
- Tweezers: These help with precise placement and adjustment.
- Scissors: For trimming the lashes to fit your eye.
- Eyelash curler: To blend your natural lashes with the falsies.
- Mascara: To further blend and define the lashes.
With the right lashes and tools, you are halfway to achieving a natural looking lash.
In conclusion, choosing the right lashes and gathering the essential tools are the first steps towards achieving flawless, natural looking false lashes. Preparation is key to a successful application that enhances your eyes without looking overdone.
Prepping Your Natural Lashes
Before you even think about touching those falsies, it’s vital to prep your natural lashes. This ensures a seamless blend and a more comfortable wear.
Clean and Curl
Start by ensuring your eyelids and lashes are clean and free of any makeup or oils. Use a gentle makeup remover if needed. Then, curl your natural lashes using an eyelash curler. Hold for a few seconds to create a nice lift.
Curling your natural lashes will provide a base for the false lashes to sit on, preventing them from looking droopy or out of place.
Apply a Light Coat of Mascara
Apply a thin coat of mascara to your natural lashes. This gives the false lashes something to grip onto and further helps to blend them together. Be sure to avoid clumpy mascaras.
Applying mascara before false eyelashes makes it look more natural and blend well once you put on the eyelashes.
Measure and Trim the False Lashes
This is a crucial step! Hold the strip of false lashes along your lash line to measure the length. If the strip is too long, carefully trim the outer corner with scissors. It’s important to trim from the outer corner to maintain the lash style.
Make sure to cut little by little to avoid cutting too much, since you could ruin the whole strip.
In summary, preparing your natural lashes through cleaning, curling, applying a light coat of mascara, and properly trimming the false lashes ensures optimal blending and comfort. This groundwork is essential for achieving a natural and seamless look once the false lashes are applied.
Applying the Lash Adhesive
The lash adhesive is what holds everything in place, so it’s important to apply it correctly. Using too much or too little can lead to mishaps.
Choosing the Right Adhesive
There are many lash adhesives on the market, each with its own pros and cons. When it comes to what adhesive you would like to purchase, remember to look at:
- Latex-free options: If you have sensitive skin or allergies, opt for a latex-free adhesive.
- Color: Clear adhesives are more forgiving for beginners, while dark adhesives can create a more defined lash line.
- Drying time: Some adhesives dry faster than others, so choose one that suits your skill level.
Applying the Adhesive
Squeeze a small amount of adhesive onto the back of your hand or a disposable surface. Using tweezers or an applicator, gently apply a thin, even layer of adhesive along the band of the false lashes. Pay extra attention to the inner and outer corners.
Waiting for the Adhesive to Get Tacky
This is the most important step! Let the adhesive sit for about 30-60 seconds, or until it becomes tacky. This allows the adhesive to properly adhere to your lash line.
If you apply the lashes while the adhesive is still wet, they will slide around and won’t stay in place.
In short, selecting the right adhesive based on your needs and preferences, applying a thin and even layer on the lash band and allowing it to become tacky before application is key to a secure, seamless fit.
The Five-Minute Application Technique
With the adhesive tacky, it’s time to apply the lashes. This part requires a steady hand and a bit of practice.
Positioning the Lashes
Using tweezers or your fingers, hold the false lashes in the center and position them as close to your natural lash line as possible. Start by placing the center of the lash band, then adjust the inner and outer corners.
Make sure the falsies are snug against your eyelid and as close to your natural lash line as possible. The close you are, the more natural the lash looks.
Securing the Corners
Once the center is in place, use the tweezers to gently press the inner and outer corners onto your lash line. Hold for a few seconds to ensure they adhere properly.
Adjusting for Comfort and Fit
If the lashes feel uncomfortable or poke at your eyes, carefully remove them and re-adjust. You may need to trim the inner corner if it’s causing irritation.
You will want to ensure that you do not apply too much adhesive when re-adjusting the false eyelashes onto your eyes.
Concluding, precise positioning, secure corner adhesion, and immediate comfort adjustments are crucial during the application phase to avoid irritation and ensure a seamless fit. These steps will make the difference between well applied and poorly applied lashes.
Blending and Finishing Touches
To truly achieve a natural look, you’ll need to blend the false lashes with your natural ones. This is where the finishing touches come in.
Pinching lashes together
Once the lashes are secure, use your fingertips or tweezers to gently pinch your natural lashes and the falsies together. This helps to meld them together and create a seamless transition.
Pinching the natural lashes and the falsie eyelashes is a small step that makes it appear as if they are natural.
Apply Another Coat of Mascara
Apply another light coat of mascara to further blend the lashes. Focus on the base of the lashes to create a fuller look.
You might want to consider water proof mascara for this step in order to make the false lashes stay on longer without separating from the natural eyelashes.
Use Eyeliner to Conceal the Lash Band
If the lash band is visible, use a thin line of eyeliner to conceal it. This creates a seamless transition between your eyelid and the lashes.
A wing liner can also work and create a sexy look that makes it appear as if the false eyelashes are natural.
In summary, pinching your natural lashes with the false eyelashes is the key to locking them together, as well as another coat of mascara as well as eyeliner to completely make it look natural and a part of your face.
Maintaining Your False Lashes
To get the most out of your false lashes, it’s important to care for them properly. This will extend their lifespan and keep them looking their best.
Removing the Lashes Properly
Never pull off your false lashes, as this can damage your natural lashes. Instead, use a makeup remover or oil-based cleanser to gently loosen the adhesive. Start from the outer corner and slowly peel the lashes away from your lash line.
Doing this helps make sure that removing your false eyelashes doesn’t injure your natural eyelashes in the process.
Cleaning and Storing the Lashes
After removing the lashes, gently clean off any residual adhesive with a cotton swab and makeup remover. Store the lashes in their original case or a clean container to maintain their shape.
Cleaning your falsies after using them will prevent bacteria from building up for further uses.
Replacing Your Lashes
With proper care, false lashes can be reused multiple times. However, it’s important to replace them when they start to lose their shape or become excessively worn. This will ensure a fresh and natural look every time.
You should consider the pricing as well as the longevity of the lash, depending on your circumstances, you may want to prefer one over the other.
In conclusion, properly removing, cleaning and storing the false lashes is essential to maintain hygiene and extend their uses from one time to multiple times without having to re-purchase.
| Key Point | Brief Description |
|---|---|
| ✨ Lash Selection | Choose natural-looking, right size lashes. |
| ⏱️ Adhesive Timing | Wait for adhesive to become tacky for best hold. |
| 👁️ Blending | Pinch lashes and apply mascara for natural integration. |
| 🧼 Maintenance | Clean and carefully store lashes to extend lifespan. |
FAQ
▼
Consider your eye shape. For example, if you have hooded eyes, look for lashes that are longer in the center. Round eyes can benefit from flared lashes that elongate the eyes.
▼
Use a gentle makeup remover on a cotton swab to carefully remove any adhesive residue. Avoid soaking the lashes in water, as this can damage them.
▼
Typically, waiting 30-60 seconds is sufficient. The adhesive should be slightly sticky, but not completely dry, before applying the lashes.
▼
Choose lashes that are not too dramatic in length or thickness. Ensure they are applied close to your natural lash line and blend them in with mascara.
▼
It’s generally not recommended, as it can damage both the false lashes and your natural lashes. Always remove them gently before going to bed.
Conclusion
Mastering the ultimate guide to applying false lashes: get a natural look in under 5 minutes is an achievable skill with the correct lash selection, prep, application of the adhesive, blending of the natural lashes with the false ones and maintenance for the lash. Now you should be more ready to get out there and show off you new lashes.


