Master Color Correction: Your 15-Minute Guide to Flawless Skin

Master the Art of Color Correction: A 15-Minute Guide to Neutralizing Redness and Dark Circles offers a quick and effective approach to achieving flawless skin by targeting specific discoloration issues like redness and dark circles with strategic makeup application techniques.
Unlock a flawless complexion in just 15 minutes! This guide will teach you how to master the art of color correction: a 15-minute guide to neutralizing redness and dark circles, revealing your best skin with easy-to-follow techniques.
Understanding Color Correction Basics
Color correction might seem daunting, but it’s a simple concept. It’s about using complementary colors to neutralize unwanted tones in your skin and create a more even base for your makeup.
Imagine a painter using specific colors to counter others – that’s essentially what we’re doing with color correcting makeup.
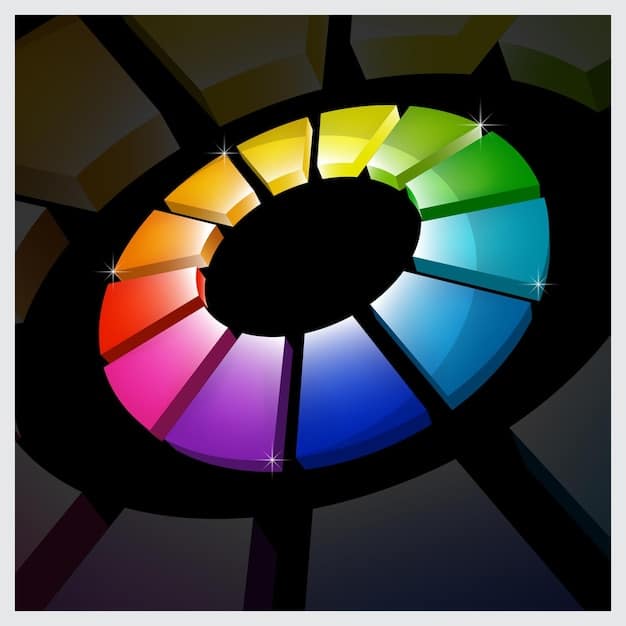
The Color Wheel & Color Correction
The color wheel is your best friend when it comes to understanding color correction. Colors opposite each other on the wheel neutralize each other. For example:
- Green cancels out redness (think blemishes and rosacea).
- Yellow combats purple or blue tones (like dark circles on fair skin).
- Peach/Orange works wonders on dark circles for medium to deep skin tones.
- Purple/Lavender brightens dullness and sallow undertones.
Understanding these relationships is key to achieving your desired results! Don’t be intimidated; with a little practice, it gets much easier.
Identifying Your Skin Concerns
Before diving into color correction, take a good look at your skin in natural light. Identifying your key concerns will help you choose the right correctors and techniques.
Are you primarily dealing with redness, dark circles, or dullness? Perhaps a combination of all three? Be precise.
Common Skin Concerns Requiring Color Correction
Here are some common skin concerns that can be addressed with color correction:
- Redness: Caused by acne, rosacea, sunburn, or irritation.
- Dark Circles: Resulting from genetics, lack of sleep, or hyperpigmentation. The color can range from blue to purple to brown.
- Dullness/ Sallowness: Skin lacking radiance and appearing yellow or ashen.
- Hyperpigmentation: Dark spots or patches caused by sun damage or acne scarring.
Knowing the root cause of your skin concern can also help you choose the right skincare products to complement your color correcting routine.
Essential Tools and Products
Having the right tools and products is crucial for a smooth and effective color correction process. You don’t need a huge arsenal, just a few essentials.
Investing in quality products will make a noticeable difference in your results and the longevity of your makeup.
- Color Correcting Concealers: These come in various forms, including creams, liquids, and sticks. Choose formulas that are lightweight and blendable.
- Concealer Brush or Sponge: A small, precise brush or a makeup sponge is essential for targeted application. Dampening the sponge can help prevent creasing.
- Setting Powder: A translucent or finely milled setting powder will lock in your color correction and prevent it from shifting.
- Foundation: A foundation that matches your skin tone will even out your complexion after you’ve neutralized your problem areas.
Consider opting for non-comedogenic products to prevent clogged pores and breakouts, especially if you have acne-prone skin.
Step-by-Step Guide to Neutralizing Redness in 15 Minutes
Redness is a common concern, but with the right approach, you can effectively neutralize it and achieve a more even skin tone – even in just 15 minutes!
The key is to use a green color corrector strategically and blend it seamlessly into your skin.
- Prep Your Skin: Start with a clean, moisturized face. A hydrating primer can also help create a smooth canvas.
- Apply Green Color Corrector: Use a small concealer brush to apply a thin layer of green **color correcting** concealer to areas with redness, such as around the nose, on blemishes, or on areas affected by rosacea.
- Blend Thoroughly: Gently tap and blend the edges of the corrector using your brush or a damp sponge. Ensure there are no harsh lines.
- Follow with Foundation: Apply your regular foundation over the color-corrected areas, blending well to create a seamless finish.
- Set with Powder: Lightly dust a translucent setting powder over your face to lock in the makeup and prevent shine.
Remember, less is more! Start with a small amount of product and build up the coverage as needed, to avoid a cakey look.
Eradicating Dark Circles: A 15-Minute Transformation
Dark circles can make you look tired and aged, but color correction can brighten the under-eye area and create a more youthful appearance – and quickly!
The shade of your dark circles determines which color corrector will work best: Yellow for cool-toned dark circles, Peach/Orange for deeper skin tones.
- Choose the Right Shade: Select a peach or orange color corrector if you have medium to deep skin, or a yellow corrector if you have fair skin with cool-toned dark circles.
- Apply Strategically: Use a small brush or your fingertip to apply the corrector to the darkest areas under your eyes, following the natural curve of the under-eye area.
- Blend Gently: Tap and blend the edges of the corrector using a damp sponge or your ring finger. Avoid dragging the product, as this can irritate the delicate skin around the eyes.
- Layer Concealer: Apply a concealer that is one shade lighter than your skin tone over the color-corrected area. Blend well to brighten the under-eye area.
- Set with Powder: Set the concealer with a finely milled setting powder to prevent creasing and prolong wear.
Avoid applying too much product, as this can accentuate fine lines and wrinkles. Focus on the darkest parts of the circle for best results.
Pro Tips for a Flawless Finish
Color correction is a skill that improves with practice, but here are some pro tips to help you achieve a flawless finish every time.
These little tweaks can make a big difference in the overall look and longevity of your color-corrected makeup.
Blending is Key
Seamless blending is absolutely crucial! Poorly blended color corrector can be more noticeable than the imperfection you’re trying to cover. Use a damp sponge or a soft brush and take your time.
Setting is Essential
Setting your color correction with powder is essential to prevent it from creasing, fading, or shifting throughout the day. Use a light hand and a fluffy brush for a natural finish.
Experiment with Textures
Color correcting products come in a variety of textures, including creams, liquids, and sticks. Experiment to find the textures that work best for your skin type and preferences.
Consider Your Undertones
Pay attention to your skin’s undertones (warm, cool, or neutral) when choosing color correcting products. This will ensure that the correctors blend seamlessly with your skin.
Don’t be afraid to mix and match different techniques and products to find what works best for your unique skin needs.
| Key Point | Brief Description |
|---|---|
| 🟢 Redness Neutralization | Use green corrector to counter redness from acne, rosacea, or sunburns. |
| 🟠 Dark Circle Correction | Apply peach/orange correctors for dark circles on medium to deep skin tones. |
| 🧽 Blending Technique | Blend color correctors seamlessly with a damp sponge or soft brush. |
| ✨ Setting for Longevity | Lock in color correction with translucent powder to prevent creasing and fading. |
FAQ
▼
Yes, if you prefer a minimal makeup look, you can spot-correct and then use a tinted moisturizer or BB cream to even out your skin tone, providing lighter coverage while still neutralizing discoloration.
▼
To avoid a cakey look, use lightweight formulas and apply thin, even layers. Blend thoroughly with a damp sponge and set with a minimal amount of translucent powder. Hydrating your skin beforehand also helps.
▼
If you apply too much, use a clean, damp sponge to gently blot away the excess product. You can also go over the area with a small amount of your regular foundation to tone down the color.
▼
Yes, color correction can help minimize the appearance of acne scars. Green correctors are effective for red acne scars, while peach or lavender correctors can brighten dark or dull scars.
▼
Yes, color correction is suitable for all skin types. However, those with oily skin may prefer matte formulas, while those with dry skin should opt for hydrating or creamy correctors to prevent dryness.
Conclusion
Mastering the art of color correction: a 15-minute guide to neutralizing redness and dark circles is an achievable goal with the right knowledge and tools. By understanding the color wheel and identifying your specific skin concerns, you can effectively neutralize unwanted tones and achieve a flawless complexion in just a few minutes each day. Practice is key, so don’t be afraid to experiment and discover the techniques that work best for you.


