Contouring and Highlighting for Beginners: Your 2026 Essential Makeup Tutorial
Contouring and Highlighting for Beginners: Your 2026 Essential Makeup Tutorial
Welcome, beauty enthusiasts, to the ultimate guide for mastering the art of contouring and highlighting! In 2026, makeup trends continue to evolve, but the timeless techniques of sculpting and illuminating the face remain a cornerstone of a polished look. Whether you’re a complete novice or looking to refine your skills, this comprehensive tutorial is designed to demystify contouring and highlighting for beginners, making it accessible, enjoyable, and incredibly effective. Get ready to transform your makeup routine and unveil a more defined, radiant you!
For years, contouring and highlighting were seen as advanced makeup techniques reserved for professional artists or those with hours to spare. However, with the advent of user-friendly products and simplified methods, anyone can achieve a beautifully sculpted face. This guide will walk you through everything you need to know, from understanding the basics to choosing the right products and applying them like a pro. We’ll focus on techniques that are practical for everyday wear, as well as those that can be amped up for special occasions.
The Enduring Appeal of Contouring and Highlighting
Why has contouring and highlighting remained so popular? The answer lies in its ability to enhance your natural bone structure, create the illusion of depth and dimension, and bring a healthy, youthful glow to your complexion. Contouring uses darker shades to create shadows, receding areas and making features appear more defined, while highlighting uses lighter, shimmery shades to bring forward and illuminate areas you want to emphasize. Together, these techniques work in harmony to sculpt, lift, and brighten your face, giving you that coveted ‘lit from within’ look.
In 2026, the trend leans towards a more natural, ‘soft glam’ approach. This means less harsh lines and more seamless blending, focusing on enhancing rather than completely altering your features. Our tutorial will embrace this philosophy, ensuring your results are always elegant and never overdone. This is particularly important for beginners, as it encourages a lighter hand and a focus on subtle enhancements.
What is Contouring?
Contouring is essentially an optical illusion. By applying a product that is a few shades darker than your natural skin tone to specific areas of your face, you create shadows that give the appearance of more defined cheekbones, a slimmer nose, or a more chiseled jawline. Think of it as painting with light and shadow to redefine your facial architecture.
What is Highlighting?
Conversely, highlighting is about bringing light to the highest points of your face, making them stand out. By applying a product that is lighter and often shimmery, you can create a radiant glow on your cheekbones, brow bone, the bridge of your nose, and your cupid’s bow. This technique makes your skin look healthier, more awake, and adds a touch of glamour.
Essential Products for Contouring and Highlighting for Beginners
Before we dive into application, let’s talk about the tools of the trade. Choosing the right products is crucial for achieving a seamless and natural finish, especially when you are just starting out with contouring and highlighting.
Contour Products
- Cream Contours: These are fantastic for beginners because they are easy to blend and offer a more natural, skin-like finish. They are often found in stick, pot, or liquid forms. Look for shades that are cool-toned, as true shadows are typically greyish-brown rather than orange.
- Powder Contours: Ideal for those with oily skin or for setting cream products. Powder contours provide a more matte finish and can be built up for intensity. Again, opt for cool-toned shades.
- Contour Palettes: Many brands offer palettes with multiple contour and highlight shades, making it convenient to find your perfect match and experiment.
Highlight Products
- Cream/Liquid Highlighters: These are excellent for a dewy, radiant glow. They can be applied before or after foundation (depending on the formula) and blended with your fingers or a damp sponge.
- Powder Highlighters: Perfect for a more intense shimmer or for setting cream highlighters. They are easy to apply and come in various finishes, from subtle sheen to blinding glitter.
- Shimmer Bricks/Palettes: Similar to contour palettes, these offer a range of highlighting shades, allowing you to customize your glow.
Essential Tools
- Contour Brush: A dense, angled brush is ideal for applying contour products precisely.
- Blending Brush: A fluffy brush or a damp beauty sponge is essential for seamlessly blending out your contour and highlight, preventing harsh lines.
- Fan Brush: A small, fluffy fan brush is perfect for applying powder highlighter to the high points of your face.
- Small Detail Brush: Useful for precise application of highlight on smaller areas like the inner corner of the eye or cupid’s bow.
When selecting shades for contouring and highlighting, remember that contour should be about two to three shades darker than your skin tone, and highlight should be one to two shades lighter. Always swatch products on your jawline or inner arm to ensure they complement your undertones.
Step-by-Step Guide: Contouring for Beginners
Now that you have your products ready, let’s dive into the practical application. Remember, practice makes perfect, and the key to natural-looking contouring is blending, blending, blending!
Step 1: Prepare Your Canvas
Start with a clean, moisturized face. Apply your foundation and concealer as usual. This creates an even base for your contour and highlight to shine.
Step 2: Identify Your Face Shape
Understanding your face shape is crucial because it dictates where you should apply contour to best enhance your features. While we’ll cover general placement, a quick search for ‘contouring for [your face shape]’ can provide tailored advice. Common face shapes include oval, round, square, heart, and long.
Step 3: Apply Your Contour Product
This is where the magic happens. We’ll focus on the most common areas for contouring:
- Under the Cheekbones: Suck in your cheeks slightly to find the hollows. Apply your contour product in a line from your ear towards the corner of your mouth, stopping about two-thirds of the way. This creates the illusion of more defined cheekbones.
- Along the Jawline: Apply contour along your jawline, from just below your ear down to your chin. This helps to define the jaw and can create a more chiseled look.
- Sides of the Nose: For a slimmer nose, apply thin lines of contour down each side of your nose, starting from the inner corner of your brow and extending to the tip. You can also apply a small amount to the very tip of your nose to make it appear shorter.
- Forehead (Hairline): If you have a larger forehead, apply contour along your hairline and temples. This helps to make your forehead appear smaller and more proportionate.
Step 4: Blend, Blend, Blend!
This is arguably the most important step for contouring and highlighting for beginners. Using your blending brush or damp beauty sponge, gently buff out the harsh lines of your contour. The goal is to create a seamless transition between your contour and your natural skin tone or foundation. Blend upwards into the hairline and downwards on the jawline. For the cheekbones, blend upwards towards your temples. For the nose, blend gently outwards.
Remember, you want to create a shadow, not a stripe!
Step-by-Step Guide: Highlighting for Beginners
Once your contour is perfectly blended, it’s time to bring on the glow with highlighting.
Step 1: Choose Your Highlighter
Decide whether you want a subtle glow with a cream or liquid highlighter, or a more intense shimmer with a powder. For beginners, a cream or liquid can be easier to control.
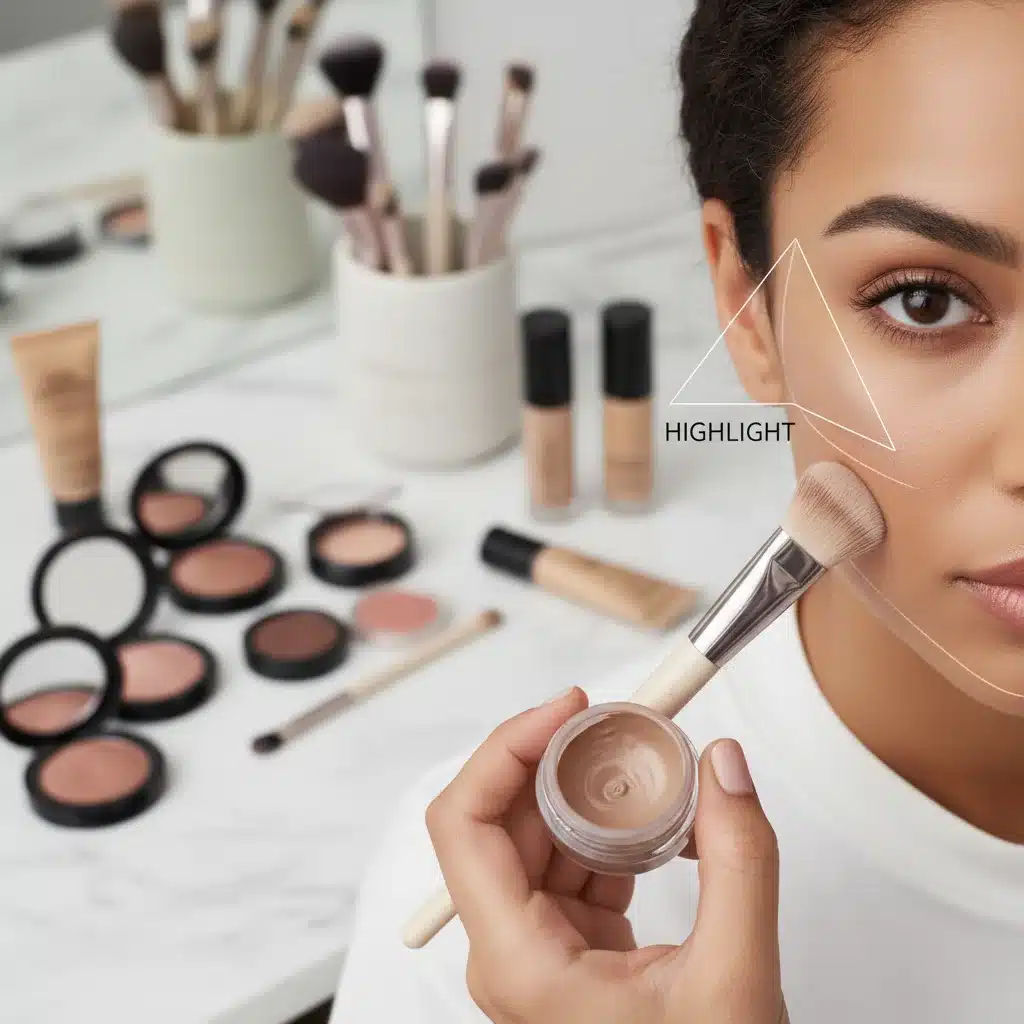
Step 2: Apply Your Highlighter Product
Focus on the high points of your face where light naturally hits:
- Top of the Cheekbones: This is the most common and impactful spot. Apply your highlighter in a C-shape from the top of your cheekbone up towards your temple.
- Brow Bone: A small dab of highlighter just under the arch of your eyebrow can instantly lift and brighten your eyes.
- Bridge of the Nose: A thin line down the bridge of your nose can make it appear straighter and more refined. Avoid applying it to the tip if you want to shorten the appearance of your nose.
- Inner Corner of the Eye: A tiny touch of highlighter here will make your eyes look brighter and more awake.
- Cupid’s Bow: Applying highlighter to the dip above your upper lip can make your lips appear fuller and more defined.
Step 3: Blend Your Highlight
Just like contouring, blending is key. For cream/liquid highlighters, use your fingertips or a damp sponge to gently tap and blend the product into your skin. For powder highlighters, use a fan brush or a small fluffy brush to lightly sweep the product onto the desired areas. You want a luminous glow, not a noticeable streak of shimmer.
Advanced Tips and Tricks for Contouring and Highlighting for Beginners (2026 Edition)
Once you’ve mastered the basics, you might want to explore some more advanced techniques and considerations:
• "Underpainting" Technique
A popular 2026 trend for contouring and highlighting involves applying contour and highlight before your foundation. This creates an incredibly natural, ‘coming from within’ sculpted look. Apply your cream contour and highlight, blend them out, and then apply a sheer layer of foundation over the top. This technique is fantastic for beginners as it minimizes the risk of harsh lines.
• Customized Contouring for Your Features
Don’t be afraid to experiment! If you want to make your lips look fuller, apply a tiny bit of contour just under the center of your bottom lip. To make your eyes appear wider, use a subtle highlight on the center of your eyelids. The possibilities are endless once you understand the principles of light and shadow.
• Setting Your Look
To ensure your contouring and highlighting last all day, especially if you have oily skin, set your cream products with a light dusting of translucent powder. You can also use a setting spray to lock everything in place and give a more seamless finish.
• The Importance of Lighting
Always do your makeup in good, natural lighting. This will help you see how your contour and highlight truly look and prevent over-application. What looks good in dim bathroom lighting might appear stark in natural sunlight.
• Don’t Forget Your Neck and Décolletage
If you’re contouring your jawline, extend a little bit of product down your neck to avoid a harsh line of demarcation. For special occasions, a touch of highlight on your collarbones can add an extra touch of glamour.
• The "No-Makeup" Makeup Trend
For those who prefer a more minimalist approach, focus on very subtle contouring and highlighting. Use minimal product, blend meticulously, and choose shades that are very close to your natural skin tone. The goal is to enhance without looking like you’re wearing much makeup at all.
Common Mistakes to Avoid When Contouring and Highlighting for Beginners
Even with the best intentions, it’s easy to make a few common blunders. Being aware of these can save you a lot of frustration:
- Using the Wrong Shade: A contour shade that’s too warm (orange) will look unnatural and muddy. A highlighter that’s too glittery or the wrong undertone can look chalky or artificial. Stick to cool-toned contours and highlighters that complement your skin’s undertone.
- Too Much Product: A little goes a long way! It’s always easier to build up product than to take it away. Start with a small amount and add more if needed.
- Not Blending Enough: Harsh lines are the number one giveaway of poorly applied contour and highlight. Dedicate time to blending until everything looks seamless.
- Applying to the Wrong Areas: Understanding your face shape and where light naturally hits is crucial. Applying contour or highlight in incorrect spots can actually work against you.
- Ignoring Your Undertones: Just like foundation, contour and highlight products should match your skin’s undertone. Cool undertones generally suit cool-toned contours and silver/champagne highlighters, while warm undertones often look best with warmer contours and gold/peach highlighters.
Maintaining Your Radiant Look Throughout the Day
Once you’ve perfected your contouring and highlighting for beginners, you’ll want to ensure it lasts. Here are some tips:
- Primer Power: Always start with a good primer. A gripping or blurring primer can create a smooth canvas and help your makeup adhere better, extending the wear of your contour and highlight.
- Layering Techniques: For maximum longevity, especially for special events, consider layering your products. Apply a cream contour and then set it with a powder contour in a matching shade. Do the same for your highlight: a liquid highlight topped with a powder highlight will stay put for hours.
- Setting Spray is Your Best Friend: A high-quality setting spray can make a significant difference. After applying all your makeup, mist your face with a setting spray. This not only helps to meld all the layers together for a more natural finish but also locks your makeup in place, preventing smudging and fading.
- Minimal Touching: Avoid touching your face excessively throughout the day. Oils from your hands can break down makeup and cause your contour and highlight to disappear.
- Blotting Papers for Oil Control: If you have oily skin, keep blotting papers handy. Instead of adding more powder, which can make your makeup look cakey, gently blot away excess oil to keep your highlight looking fresh and your contour defined.
The Future of Contouring and Highlighting: 2026 Trends and Beyond
As we navigate 2026, the beauty landscape continues to evolve, but the core principles of contouring and highlighting remain steadfast. The emphasis is increasingly on personalization and enhancing individual beauty rather than adhering to rigid rules. Here’s what we’re seeing and what beginners should keep in mind:
- Skinimalism Meets Sculpting: The ‘skinimalism’ trend – focusing on healthy, glowing skin with minimal product – is influencing contouring and highlighting. This means lighter formulas, sheer applications, and a focus on strategic placement to enhance natural bone structure without looking heavily made up. Cream and liquid products are reigning supreme for this natural finish.
- Strategic Placement for Specific Concerns: Beyond traditional contouring, artists are using these techniques to address specific concerns. For instance, a touch of highlight on the center of the forehead and chin can create balance if you have a prominent nose. Subtle contouring around the lips can create a plumping effect without fillers.
- Multi-Use Products: The demand for versatile products is growing. Look for contour sticks that can double as eyeshadow bases or highlighters that can be mixed into foundation for an all-over glow. These are excellent investments for beginners as they simplify your makeup bag and routine.
- Inclusive Shade Ranges: The beauty industry continues to expand its shade ranges, ensuring that everyone, regardless of skin tone, can find their perfect contour and highlight. This is a game-changer for beginners who might have struggled to find suitable shades in the past.
- Sustainable Beauty: Eco-conscious choices are becoming paramount. Many brands are now offering refillable packaging for contour and highlight products, as well as formulas with ethically sourced ingredients. Consider these options as you build your makeup collection.
The beauty of contouring and highlighting in 2026 is its adaptability. It’s no longer about following strict rules but about understanding the principles and applying them in a way that makes you feel confident and beautiful. As a beginner, embracing this flexibility will empower you to experiment and discover what works best for your unique features and style.
Conclusion: Embrace Your Inner Artist with Contouring and Highlighting
Congratulations! You’ve just completed your essential guide to contouring and highlighting for beginners in 2026. Remember, makeup is an art form, and your face is your canvas. Don’t be afraid to experiment, practice, and most importantly, have fun with it.
Start with a light hand, blend meticulously, and observe how different placements affect your features. Over time, you’ll develop an intuitive understanding of what works best for you. Whether you’re aiming for a subtle everyday enhancement or a more dramatic sculpted look for a special event, the skills you’ve learned here will serve as a strong foundation.
Embrace the power of light and shadow to define your features, enhance your natural beauty, and radiate confidence. With these tips and tricks, you’re well on your way to mastering contouring and highlighting and achieving that flawless, sculpted glow you’ve always desired. Happy contouring and highlighting!


