Color Correcting 101: Your Guide to Flawless Skin
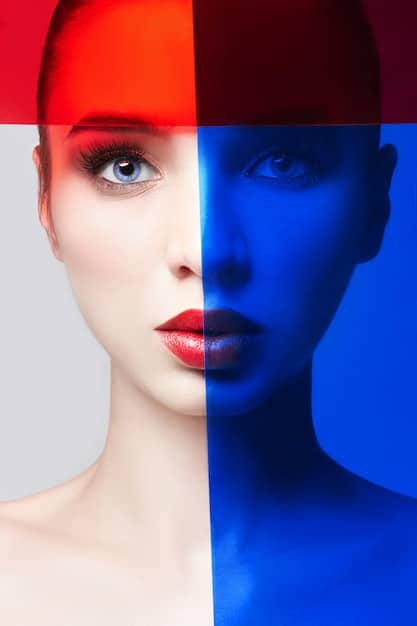
Color correcting is a makeup technique that uses specific colored concealers to neutralize discoloration on the skin, effectively minimizing blemishes, dark circles, and uneven skin tone for a radiant complexion.
Want to achieve a flawless complexion? **Color correcting 101: Banish blemishes and dark circles for a radiant complexion** is your first step. Unlock the secrets to evening out your skin tone with this simple guide.
Understanding Color Correcting
Color correcting is based on the color wheel, where opposite colors neutralize each other. Understanding this concept is crucial for effectively addressing various skin concerns.
The Color Wheel
The color wheel is your guide to understanding which colors cancel each other out. This principle is the foundation of color correcting.
Essentially, if you have discoloration in one color, you need to use the color directly opposite on the wheel to neutralize it. For instance, green corrects red, peach corrects blue, and so on
Why Color Correct?
Why not just use a regular concealer? Color correctors address the underlying discoloration, providing a more natural-looking result.
- Neutralization: Color correctors directly counteract unwanted tones in the skin.
- Reduced Product: You’ll use less foundation and concealer.
- Natural Finish: Corrects without looking cakey or heavy.
Think of it as laying the perfect base before applying your usual makeup. Color correcting addresses the actual discoloration rather than just covering it up.
In conclusion, understanding color correcting starts with grasping how opposite colors on the color wheel can neutralize skin imperfections.

Choosing the Right Colors
Selecting the right color corrector depends on the specific discoloration you’re aiming to address. Here’s a guide to the most common shades and their uses.
Green
Green color corrector is used to neutralize redness. Think acne, rosacea, or sunburns.
Apply it sparingly only to the areas that are red. Applying it all over can make your skin look dull or even ashy.
Peach/Orange
Peach or orange correctors target blue or purple discoloration. Ideal for dark circles under the eyes, especially in fair to medium skin tones.
- Peach: Works best for light to medium skin tones.
- Orange: Is better suited for deeper skin tones.
- Application: Tap gently under the eyes to avoid tugging.
Yellow
Yellow color corrector is effective for concealing mild redness and brightening the skin. It’s also useful for covering up hyperpigmentation.
It generally suits a variety of skin tones and can be used all over the face in small amounts.
Purple/Lavender
This is used to neutralize yellow or sallow undertones. If you have dull or tired-looking skin, purple can help brighten it up.
It is especially effective for use on parts of the face that tend to look dull, like the forehead or chin.
In summary, selecting the right color relies on identifying the specific discoloration you want to neutralize, and then choosing the color that sits opposite it on the color wheel.
Application Techniques
Once you’ve chosen your color correctors, the next step is to apply them correctly. Here are some tips for a flawless finish.
Prep Your Skin
As with any makeup application, starting with well-prepped skin is essential. Cleanse, moisturize, and apply a primer to create a smooth canvas.
Prepping ensures the product blends seamlessly and doesn’t cling to dry patches.
Apply Sparingly
Less is more when it comes to color correcting. Use a small amount of product and build it up as needed to avoid a cakey appearance.
- Tools: Use a makeup sponge, brush, or your fingertips.
- Layering: Apply the color corrector only to the areas that need it.
- Blending: Gently blend the edges to avoid harsh lines.
Layering and Blending
After applying the color corrector, blend it well into the skin using a damp makeup sponge or a brush. The goal is to neutralize the discoloration, not to create a visible layer of color.
Use gentle tapping motions to blend the product into the skin, being careful not to move the product around too much. If necessary, set the color corrector with a light dusting of translucent powder to prevent it from moving.
To summarize, the key to color correcting is prepping the skin, using the product sparingly, and blending properly to ensure a seamless, natural look.
Choosing the Right Product Formula
Color correctors come in various forms, including creams, liquids, and sticks. The best formula for you depends on your skin type and the area you’re correcting.
Cream Correctors
Cream formulas are generally thicker and provide more coverage. They are well-suited for dry skin or for covering up significant discoloration.
They can also be mixed with moisturizer or primer to sheer out the formula.
Liquid Correctors
Liquid formulas are lightweight and easy to blend. They’re perfect for normal to oily skin types and for correcting large areas.
- Buildable: Can be layered for increased coverage.
- Natural finish: Provides a skin-like appearance.
- Versatile: Use for spot correcting or all-over correction.
Stick Correctors
Stick correctors offer precise application and are great for on-the-go touch-ups. They tend to be more pigmented and provide high coverage.
Work great for covering up acne or scars, where precision is key.
In conclusion, the best product is the one that matches your skin type and provides the coverage and blendability that yields a natural and flawless look.
Step-by-Step Color Correcting Routine
Creating a color correcting routine can seem daunting, but broken down into a simple step-by-step process, you will be on your way to flawless skin in no time.
Assess Your Skin
Start by examining your skin in natural light. Identify areas of discoloration that need correction: redness, dark circles, or sallowness.
Knowing the correct steps also plays a part in finding the best routine that fits your lifestyle.
Apply Color Corrector
Using a small brush or your fingertips, apply the appropriate color corrector to the problematic areas. Remember less is more, so start with a thin layer and build up as needed.
- Green: Apply to areas with redness.
- Peach/Orange: Apply under the eyes.
- Yellow: Apply to areas with mild redness or hyperpigmentation.
Blend Thoroughly
Gently blend the color corrector into your skin until the color is neutralized. Use a damp makeup sponge or your fingertips to seamlessly integrate the corrector with your skin. Avoid rubbing, as this can move the product around and disrupt the coverage.
Ensure that the edges are well blended to prevent any harsh lines or visible patches of color.
Apply Foundation and Concealer
Once the color corrector is blended, apply your regular foundation and concealer. Choose a foundation that matches your skin tone and provides the coverage you desire. Apply it over the color-corrected areas and blend well.
If necessary, apply concealer to further brighten the under-eye area or cover any remaining imperfections. Set everything with a light dusting of translucent powder to ensure it stays in place all day.
In summary, a solid routine starts with knowing what color to use, blending well, and completing the routine with foundation and concealer.
Tips and Tricks for Success
Perfecting color correcting takes practice. Here are some additional tips to help you achieve the best results and avoid common pitfalls.
Use the Right Lighting
Always apply makeup in good lighting, preferably natural light. Artificial light can distort colors and make it difficult to see how the corrector is blending.
A well-lit environment is key in making sure the technique works effectively
Don’t Overdo It
Applying too much color corrector can result in a muddy or unnatural look. Start with a minimal amount and build up coverage only where needed.
- Buildable Coverage: Add layers for maximum effect.
- Sheer Formulas: Great for beginners.
- Test Application: Do a test run before events.
Set with Powder
Setting your color correction with a translucent powder helps to prevent creasing and ensures that your makeup lasts longer. Use a light hand and apply the powder only to the areas where you’ve used color corrector.
This is especially important under the eyes, where makeup tends to crease easily.
To summarize, mastering the routine takes time and patience. Using the correct lighting, not overdoing it, and setting it with powder are key to the routine.
| Key Point | Brief Description |
|---|---|
| 🟢 Neutralize Redness | Use green color corrector to counteract redness from acne or rosacea. |
| 🍑 Conceal Dark Circles | Apply peach or orange corrector under eyes to cancel out blue or purple tones. |
| ✨ Brighten Dullness | Employ purple or lavender to neutralize yellow and brighten sallow undertones. |
| 🧴 Prep Your Skin | Always start with clean, moisturized skin for smoother blending and better results. |
FAQ
▼
Color correcting is a makeup technique that uses specific colored concealers to neutralize discoloration in the skin. By applying colors opposite each other on the color wheel, you can effectively minimize blemishes, dark circles, and uneven skin tone.
▼
The colors you need depend on your skin concerns. Green corrects redness, peach/orange corrects blue or purple discoloration, yellow corrects mild redness, and purple/lavender neutralizes yellow or sallow undertones.
▼
Start with clean, moisturized skin. Apply a small amount of the appropriate color corrector to the areas with discoloration. Blend it well into the skin, and follow up with your regular foundation and concealer for a flawless finish.
▼
A lot of the time you may still want to follow up with foundation, however it may not always be necessary. After all, you may feel that that the discoloration has been minimised enough on its own. It’s down to your own discretion.
▼
If you apply too much color corrector, it can result in a muddy or unnatural look. Try to blend it out as much as possible, if the problem persists then gently remove the makeup and start again with a smaller amount.
Conclusion
Mastering color correcting can significantly improve your makeup routine. By understanding the color wheel and practicing application techniques, you can achieve a flawless and radiant complexion. Start experimenting today and discover the transformative power of color correcting for your unique skin needs.

