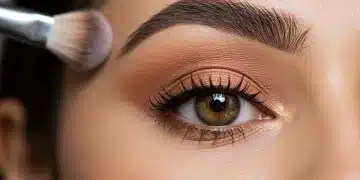
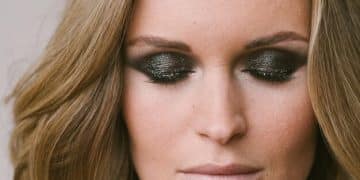
Beginner’s guide to eyeshadow blending techniques

A beginner’s guide to eyeshadow blending involves selecting the right colors, using proper tools, and applying techniques like gentle circular motions for seamless transitions and avoiding common mistakes like applying too much product.
Are you looking to master your eye makeup? This beginner’s guide to eyeshadow blending is just what you need. Blending might seem daunting, but with the right techniques, you can create stunning looks that highlight your features beautifully. Let’s dive into the world of colors and transitions!
Understanding the basics of eyeshadow blending
Understanding the basics of eyeshadow blending is crucial for achieving a polished look. Blending helps create seamless transitions between colors, making eye makeup appear more professional. If you’re just getting started, don’t worry! With a few tips and some practice, you’ll be on your way to mastering this essential technique.
Types of Eyeshadow
Before blending, it’s vital to know the different types of eyeshadows available. Each type can impact your blending technique:
- Powder Eyeshadows: These are the most common and are easy to blend.
- Cream Eyeshadows: These can provide a smooth texture but may require special tools.
- Liquid Eyeshadows: Usually more vibrant but need to be blended quickly to avoid drying.
Once you know which eyeshadow type to use, the next step involves selecting your brushes. Different brushes will produce different results, impacting how colors are blended together. A fluffy blending brush is often ideal for soft transitions, while a smaller brush might be better for precise application.
Importance of a Good Base
A good eyeshadow base is essential for effective blending. Before applying eyeshadow, consider using a primer to enhance color payoff and adhere the product to your lids. This step can truly make a difference in how well your colors blend together.
Another tip is to start with lighter colors before moving to darker shades. This will help create depth and dimension in your makeup. Keeping the transitions smooth is what makes the blending look more natural.
Blending Techniques
To get the perfect blend, use the right movements. Gentle, circular motions can help soften harsh lines. Remember to tap off excess product on your brush to avoid overwhelming your eyelids. If you find that the edges are too sharp, don’t hesitate to go back in with a clean blending brush to soften them.
Essential tools for blending eyeshadow
Having the right tools can transform your eyeshadow blending experience. Essential tools make it easier to create beautiful looks and achieve that professional finish. Let’s explore the must-have items in your makeup bag.
Blending Brushes
Blending brushes are the key to a smooth application. A good fluffy blending brush is your best friend, as it helps distribute product evenly across the eyelid.
- Fluffy Blending Brush: Perfect for soft transitions.
- Angled Brush: Great for creating definition in the crease.
- Pencil Brush: Ideal for precision work.
Selecting the right size and shape of brush will greatly impact how well your eyeshadow blends together. Each brush has its unique purpose, so understanding them is essential. When blending, always use gentle strokes to ensure a seamless look.
Eyeshadow Primer
Another tool you shouldn’t overlook is eyeshadow primer. This product helps to create a smooth base for applying your shadows, ensuring they stay vibrant throughout the day. It also prevents creasing, allowing for flawless blends.
Choosing a good primer can enhance color payoff and longevity. Make sure to apply it evenly across the eyelid and allow it to dry before starting with your shadows. When using primer, remember that a little goes a long way. This simple step can be the game changer in your blending process.
Makeup Remover
Even the best blending can sometimes go wrong. Having makeup remover handy allows you to correct mistakes without starting over. Choose a gentle formula to avoid irritations and keep your skin feeling fresh. You can use cotton pads or swabs for precise corrections.
Step-by-step techniques for perfect blending

Achieving perfect eyeshadow blending can seem challenging, but with the right techniques, it becomes much easier. Following a step-by-step process can make a huge difference in your makeup application.
Prepare Your Eyelids
Start by applying a good eyeshadow primer. This creates a smooth canvas for your shadows. A primer helps the colors adhere better and prevents creasing. Spread a thin layer evenly and let it dry for a few seconds.
Choosing Your Colors
When selecting eyeshadow colors, always begin with a light shade for your base. Next, choose mid-tone and darker shades to define your look. This gradient will help your eyes pop.
Application Process
First, apply the lightest shade all over the eyelid. Use a flat brush for this step. Then, take your mid-tone color and apply it to the crease of your eye.
- Use a Fluffy Brush: This helps to blend colors naturally.
- Start Light: Apply less product at first; you can build it up.
- Blend in Circular Motions: This technique softens harsh lines for a smoother transition.
Once the mid-tone is applied, it’s time to add the darker shade. Focus on the outer corner of the eyelid for depth. Here, using a smaller brush will provide more precision.
Blend all the colors together using the fluffy brush. Swirl gently between each color to ensure there are no harsh lines. This step is vital for a polished look.
Final Touches
For the last part, you can add a highlight to your brow bone and inner corner of the eye with a light, shimmery shade. This final detail enhances your eye makeup and opens up your eyes.
Common mistakes to avoid when blending
Avoiding common mistakes is essential for achieving flawless eyeshadow blending. Many beginners make errors that can easily be fixed with some knowledge and practice. Here are some mistakes to watch out for.
Applying Too Much Product
One of the biggest mistakes is using too much eyeshadow at once. It’s easy to overwhelm your eyelids with color. Instead, start with a small amount. You can always build up the color as needed. This technique allows for better blending and a more natural look.
Not Using the Right Tools
Using the wrong brushes can drastically affect how your eyeshadow blends. For instance, using a flat brush to blend isn’t effective. Instead, use a fluffy blending brush that can diffuse color. Make sure to clean your brushes regularly to avoid mixing colors unintentionally.
Neglecting to Blend
Sometimes, beginners forget to blend properly. Harsh lines can ruin the whole look. Take your time and use gentle circular motions to soften the edges. A clean blending brush can help with this process, allowing for a seamless transition.
Another common mistake is blending too aggressively, which can lead to patchiness. Remember, blending is about creating a smooth gradient, not pushing too hard. Be patient and take breaks if needed.
Choosing Incompatible Colors
Using colors that don’t complement each other can lead to a messy appearance. Stick to a color palette that works well together. Consider the undertones of your colors and how they balance. Sometimes, too much contrast isn’t the best choice for blending.
Skipping the Primer
Finally, skipping eyeshadow primer is a mistake many make. Primer helps shadows adhere better and can prevent creasing throughout the day. Applying it before any eyeshadow can enhance your blending experience and improve wear.
Tips for choosing the right eyeshadows
Choosing the right eyeshadows can make all the difference in your eyeshadow blending experience. With thousands of options available, it’s important to know what works best for your look. Here are some tips to guide you.
Understand Color Theory
Familiarizing yourself with basic color theory can help you select shades that complement your eyes and skin tone. Colors opposite each other on the color wheel can create striking contrasts, while similar shades provide a more harmonious look. Consider your eye color when picking shadows; for instance, purples can enhance green eyes, while warm browns can make blue eyes pop.
Consider Your Skin Tone
Your skin tone plays a pivotal role in which eyeshadow shades will look best on you. For warm skin tones, earthy shades like oranges and golds work wonders. Cooler skin tones tend to look better in blues and silvers. Many brands have tools to help you find the right colors based on your complexion.
Choose the Right Finish
Eyeshadows come in various finishes—from matte to shimmer to metallic. Understanding how each finish affects your look is essential. Matte shadows are perfect for daytime looks, while shimmer and metallics can be great for night outings or special occasions. When blending, layer different finishes for added depth.
- Matte Finishes: Good for transitions and blending.
- Shimmer Finishes: Great for highlighting.
- Metallic Finishes: Bold looks for special occasions.
When testing new colors, try applying them directly to your eyelids. This allows you to see how the color appears against your skin and how well it blends with your other shadows.
Pay Attention to Quality
Quality matters when choosing eyeshadows. Invest in brands known for their pigmentation and blendability. Cheaper formulas may lack color payoff and can often appear chalky on the skin. Looking for eyeshadow palettes with good reviews can help guide your choices.
FAQ – Frequently Asked Questions about Eyeshadow Blending
What is the best way to start blending eyeshadow?
Begin by applying a good eyeshadow primer to create a smooth base and then use a light shade as your foundation.
How do I choose the right eyeshadow colors for my skin tone?
Warm skin tones look great with earthy shades, while cool tones often suit blues and silvers. Consider your undertone when selecting colors.
What tools do I need for blending eyeshadow effectively?
A fluffy blending brush, a flat brush for application, and a smaller brush for precise areas are essential for effective blending.
How can I fix mistakes while blending?
Use a makeup remover or a clean brush to soften harsh lines and gently blend the edges. Don’t hesitate to start over if necessary.
