Contouring and highlighting techniques for a flawless look

Contouring and highlighting techniques enhance your natural beauty by defining features and adding dimension, using products matched to your skin tone for a flawless appearance.
Contouring and highlighting techniques can truly transform your makeup game. Ever wondered how some achieve that sculpted look? It’s all about knowing the right methods and products. In this article, we’ll unveil the secrets to mastering these techniques so that you can enhance your natural beauty effortlessly.
Understanding the basics of contouring
Understanding the basics of contouring is essential for anyone looking to enhance their makeup skills. Contouring is a technique that helps define your features by creating shadows and highlights on your face. With a few products and some simple steps, you can achieve a more sculpted appearance.
What is Contouring?
Contouring involves using makeup products that are a few shades darker and lighter than your skin tone. The darker shades create the illusion of shadows, while the lighter shades highlight certain areas. This contrast can make your cheekbones pop and your jawline appear sharper.
Essential Products for Contouring
- Contouring cream or powder
- Highlighter
- Blending brush or sponge
- Setting powder
To get started, apply the contour product on areas you want to define, such as under your cheekbones, along your jawline, and on the sides of your nose. It’s important to blend well to avoid harsh lines. Once you’ve added the contour, apply the highlighter on your cheekbones, brow bones, and the bridge of your nose for a luminous finish.
Choosing the Right Shades
Picking the right shades for your skin tone is crucial. If you have a warm undertone, opt for golden or peachy tones. For cooler undertones, choose taupe or pinky shades. This choice will help achieve a more natural look and enhance your features without looking overly made up.
Remember, practice makes perfect! Try different techniques and find out what works best for your face shape and style. Everyone’s features are unique, so don’t be afraid to experiment until you feel comfortable.
Contouring is all about enhancing your natural beauty. With practice and patience, you’ll master the art of contouring and highlighting, making them a staple in your makeup routine.
Essential products for contouring and highlighting
Using the right products is crucial for effective contouring and highlighting. There are different types of products that can help achieve a flawless look. Knowledge of these products will enable you to enhance your features beautifully.
Types of Contouring Products
Contouring products come in cream, liquid, and powder forms. Each type has its own unique advantages. Cream products can provide a natural finish, while powders are great for setting your makeup. Liquid contours can be blended easily for a soft look.
Key Must-Have Items
- Contour Palette: Invest in a good contour palette that includes various shades.
- Highlighter: A quality highlighter is essential for achieving that radiant glow.
- Blending Tools: Use brushes or sponges to blend products seamlessly.
- Setting Spray or Powder: Lock your look in place with a setting product.
Choosing the right products can be challenging. Look for contours that are matte and highlighters that have a slight shimmer. Always test shades on your skin to find the perfect match. Avoid overly shimmery products during the day; instead, opt for a subtle glow.
Application Tools
Tools play an important role in contouring. Using the right brushes can make a big difference. A small, angled brush is perfect for applying contour in the hollows of your cheeks. A fan brush works well for applying highlighter on your cheekbones and brow bones. Blending is key to a natural look, and for that, a beauty sponge can be a lifesaver.
Whether you’re a beginner or a pro, having these essential products and tools will make the process of contouring and highlighting much easier. Remember, practice is important, so keep experimenting!
Step-by-step guide to contouring your face
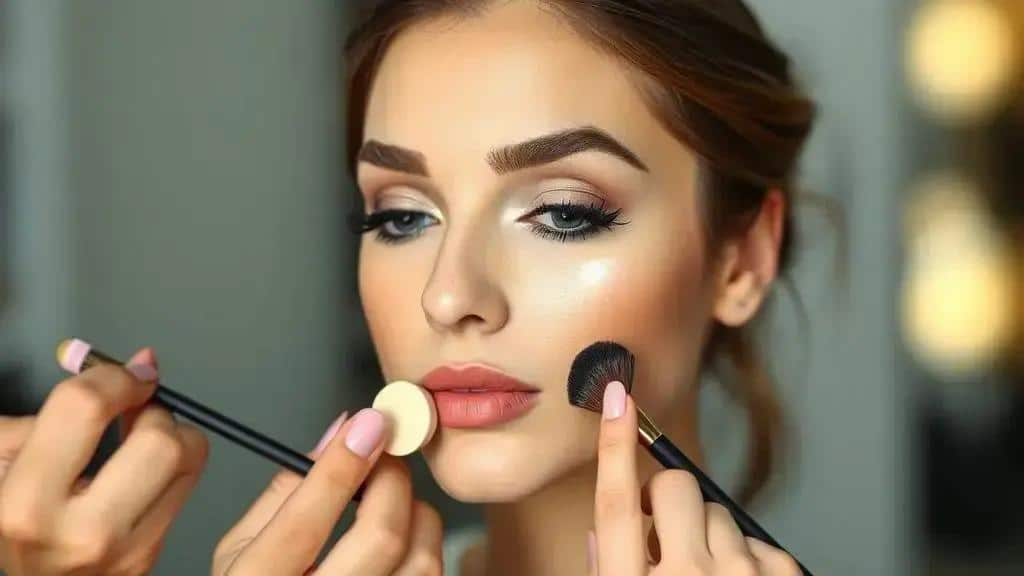
A step-by-step guide to contouring your face can help you achieve a beautifully sculpted look. Follow these simple instructions to enhance your features with makeup.
Preparing Your Skin
Before you begin contouring, make sure your skin is clean and moisturized. Apply a primer to create a smooth base. This helps your makeup go on evenly and last longer. Once your primer has set, use a foundation that matches your skin tone.
Choosing the Right Shade
Pick a contour shade that is 1-2 shades darker than your foundation. For highlighting, choose a shade that is 1-2 shades lighter. Test the products on your wrist or jawline to find the perfect match for your skin tone.
Applying Contour and Highlight
Start with the contour product. Use an angled brush to apply it in the hollows of your cheeks, along your jawline, and on the sides of your nose. Blend well to avoid harsh lines. Next, apply the highlighter on the tops of your cheeks, brow bones, and down the bridge of your nose. Blend it softly to create a radiant glow.
- Cheeks: Apply contour in an upward motion from your ears toward your nose.
- Jawline: Use a sweeping motion to apply contour beneath your jawline.
- Nose: Draw a line down each side of your nose with contour for a slimmer appearance.
- Forehead: Apply contour along your hairline to make your forehead appear smaller.
Blending is essential for a natural look. Use a beauty sponge or brush to blend all products seamlessly. Make sure there are no harsh lines. Always check your makeup in natural light to ensure it looks good.
After applying and blending, set your makeup with a light dusting of translucent powder. This helps to keep everything in place and gives a matte finish. Finish with a setting spray for longevity.
Common mistakes in contouring and highlighting
Understanding common mistakes in contouring and highlighting is key to perfecting your makeup skills. Many people struggle with contouring, but identifying these errors can make a significant difference.
Using the Wrong Shades
One of the biggest errors is choosing shades that do not match your skin tone. Using a contour that is too dark can create harsh lines, while a highlighter that is too light can look unnatural. Ensure that your contour is one to two shades darker than your skin, and your highlighter is one to two shades lighter.
Not Blending Properly
Another common mistake is failing to blend. Blending is essential for a natural look. If you leave visible lines, your makeup will appear unpolished. Always use a clean blending sponge or brush. Take the time to blend out the edges well.
Applying Too Much Product
Less is often more when it comes to contouring and highlighting. Applying too much product can lead to a cakey appearance. Start with a small amount and build up if you need more. This way, you can control the intensity.
Forgetting to Set Your Makeup
Many people forget to set their makeup after contouring. A setting powder or spray will help keep your makeup in place throughout the day. Without setting, your work may fade or wear off quickly.
- Skipping Skincare: Always prep your skin before applying makeup. Clean, moisturized skin helps products apply smoothly.
- Ineffective Application Techniques: Learn the right techniques to apply contour and highlight for your face shape.
- Ignoring Lighting: Consider the lighting conditions when applying makeup, as it can drastically change how your makeup looks.
- Not Assessing in Natural Light: Always check your makeup in natural light to see how it truly appears.
By avoiding these common mistakes, you can refine your contouring and highlighting skills. Practice regularly, and you will see improvement in your technique.
Tips for choosing the right shades
Selecting the right shades for contouring and highlighting is crucial for achieving a natural look. The wrong shades can make your makeup appear harsh and unnatural. Here are some tips to help you choose the perfect colors for your skin tone.
Know Your Undertone
Before picking shades, it’s essential to determine your skin’s undertone. Skin tones generally fall into three categories: warm, cool, and neutral. You can find your undertone by checking the veins on your wrist. If they appear green, you likely have a warm undertone. If they look blue or purple, you have a cool undertone. If you can’t decide, you may have a neutral undertone.
Choosing Contour Shades
For contour products, select colors that are 1-2 shades darker than your skin tone. Warm undertones should go for taupe or golden shades. Cool undertones will benefit from gray-toned contours. Neutral undertones can choose shades that blend both warm and cool options.
Finding Highlighting Shades
When it comes to highlighters, look for products that are 1-2 shades lighter than your skin tone. For warm undertones, golden highlights will complement your complexion beautifully. If you have a cool undertone, silver or pink hues work best. Neutral undertones can experiment with both gold and silver highlighters.
- Test Before You Buy: Always swatch products on your jawline to see how they blend with your skin.
- Consider the Season: Your skin may lighten or darken with the seasons, so adjust your shades accordingly.
- Ask for Help: Don’t hesitate to ask beauty advisors in stores for assistance with shade matching.
- Look for Reviews: Reading reviews can help you gain insights into how well products perform on different skin types.
The key to successful contouring and highlighting lies in choosing the right shades for your unique features. With these tips, you are well on your way to mastering your makeup.
In conclusion, mastering contouring and highlighting takes practice, but it’s worth the effort. By choosing the right shades and applying them correctly, you can enhance your natural beauty. Remember to avoid common mistakes like using the wrong tones or failing to blend properly. With these tips and techniques, you’ll be on your way to creating flawless looks that highlight your best features. Keep experimenting and have fun with your makeup!
FAQ – Frequently Asked Questions about Contouring and Highlighting
What is the best way to choose contour and highlight shades?
The best way is to know your skin’s undertone. Use contour shades that are 1-2 shades darker and highlight shades that are 1-2 shades lighter than your natural skin tone.
How can I avoid common mistakes in contouring?
To avoid mistakes, always blend well, use appropriate shades, and start with a little product, building up as needed for a natural look.
What tools do I need for effective contouring?
Essential tools include contour and highlighter products, blending brushes, sponges, and setting spray or powder to lock in your makeup.
How do I know if my contour looks good?
Always check your makeup in natural lighting to ensure it blends well and looks natural. Adjust as needed before finishing your look.

