Eyeshadow Blending: The Ultimate Guide for Seamless Transitions

The Ultimate Guide to Eyeshadow Blending explores step-by-step techniques using the right brushes and products for creating seamless transitions and professional eye makeup looks, ensuring a flawless finish every time.
Achieving a flawless eye makeup look hinges on one crucial skill: the ultimate guide to eyeshadow blending: achieve seamless transitions every time. Blending is the key to creating depth, dimension, and a professional-looking finish, effortlessly transforming a patchy application into a work of art.
Understanding Eyeshadow Blending
Eyeshadow blending can seem daunting, but understanding the basics is key. It’s not just about smearing colors together; it’s about creating a gradient that complements your eye shape and color. Let’s dive into the essential elements.
Why is Blending Important?
Blending ensures there are no harsh lines between eyeshadow shades, creating a smooth transition. This makes the overall look more polished and prevents a “patchy” or “unblended” appearance.
Proper blending also allows you to create dimension and depth, enhancing your eyes and making them appear larger and more defined.
- Seamless Transition: Eliminates harsh lines for a soft, gradient effect.
- Enhanced Dimension: Creates depth and makes eyes appear larger.
- Professional Finish: Achieves a polished and sophisticated eye makeup look.
Without effective blending, even the most beautiful colors can look amateurish. So, mastering this skill is a game-changer for any makeup enthusiast.
In summary, understanding the principles behind eyeshadow blending sets the foundation for creating sophisticated and seamless eye makeup looks. It’s about the artistry of smooth transitions and enhanced dimension.
Essential Tools for Eyeshadow Blending
Having the right tools can make or break your blending game. While you can technically blend with any brush, specific brushes designed for blending make the process much easier and more effective. Let’s explore the must-have tools.
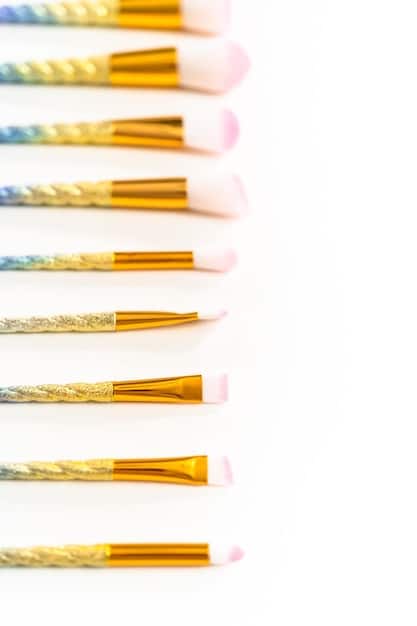
The Right Brushes
Fluffy blending brushes are the workhorses of eyeshadow blending. They have soft, flexible bristles that allow you to diffuse color effortlessly. Look for brushes with a slightly tapered shape for the best results.
Pencil brushes are smaller and more precise, perfect for blending in the crease or along the lower lash line. Their pointed shape allows for targeted application and detailed blending.
- Fluffy Blending Brushes: Ideal for diffusing color across the lid.
- Pencil Brushes: Perfect for blending in the crease and lower lash line.
- Angled Brushes: Great for defining the outer corner of the eye.
High-quality brushes are an investment, but they will last longer and perform better. Synthetic brushes are a good option for those with allergies or who prefer vegan products.
In essence, equipping yourself with the right blending brushes is essential for achieving seamless eyeshadow transitions. These tools empower you to create professional-looking results effortlessly.
Preparing Your Eyelids for Eyeshadow
Before diving into eyeshadow application, prepping your eyelids is crucial for ensuring longevity and vibrancy. A smooth, even base will not only make blending easier but also prevent creasing and fading. Here’s how to prepare your eyelids for eyeshadow application.
Priming for Perfection
Using an eyeshadow primer is a non-negotiable step. Primer creates a smooth canvas, prevents creasing, and helps eyeshadow adhere better to the skin. Apply a small amount of primer evenly across your eyelids, from lash line to brow bone.
If you don’t have an eyeshadow primer, you can use a concealer. Just make sure to set it with a translucent powder to prevent it from creasing.
- Even Base: Primer creates a smooth surface for eyeshadow application.
- Crease Prevention: Prevents eyeshadow from settling into creases.
- Enhanced Vibrancy: Makes eyeshadow colors appear more vibrant.
Allow the primer to dry completely before applying any eyeshadow. This will ensure that your eyeshadow blends seamlessly and lasts all day.
In summary, preparing your eyelids with a primer is a fundamental step in achieving long-lasting, vibrant, and crease-free eyeshadow looks. This base ensures optimal blending and color payoff.
Step-by-Step Eyeshadow Blending Techniques
Now that you have the right tools and a prepped canvas, it’s time to dive into the techniques. Mastering these steps will help you achieve seamless eyeshadow blends every time. Let’s break it down.
The Basics of Blending
Start by applying your transition shade—a color slightly darker than your skin tone—in the crease. Use a fluffy blending brush and apply the color in windshield-wiper motions, blending it out towards the brow bone.
Next, apply your main lid color with a flat shader brush. Pat the color onto the lid, focusing on the center and blending it outwards towards the crease.
- Transition Shade: Apply a neutral shade in the crease for a smooth transition.
- Lid Color: Pat the main color onto the lid, blending outwards.
- Circular Motions: Use small, circular motions to blend colors together.
Remember to blend in small, circular motions to avoid harsh lines. Build up the color gradually, as it’s easier to add more than to take away.
In short, the fundamentals of layering and blending with the right techniques will give you a perfect starting point for your eyeshadow journey.
Advanced Blending Tips and Tricks
Once you’ve mastered the basics, it’s time to level up your blending game. These advanced tips and tricks will help you achieve even more seamless and professional-looking results. Let’s explore some extra tips.

Layering Colors for Depth
Layering different shades of eyeshadow can create depth and dimension. Start with lighter shades and gradually build up to darker shades in the crease and outer corner of the eye.
Use a damp brush to apply shimmery or metallic eyeshadows for an intensified effect. This will make the colors pop and create a more dramatic look.
- Multiple Shades: Layer different colors to create depth and dimension.
- Damp Brush: Use a damp brush for intensified shimmer and metallic shades.
- Highlighting: Add a light shimmer to the inner corner of the eye to brighten.
Don’t forget to highlight the inner corner of the eye with a light shimmer shadow to brighten the eyes and make them look more awake.
Ultimately, these advanced techniques will elevate your blending skills, allowing you to craft mesmerizing and nuanced eye makeup looks.
Troubleshooting Common Blending Problems
Even with the right techniques, you might encounter some common blending problems. Knowing how to troubleshoot these issues will help you perfect your eyeshadow looks. Let’s address these issues.
Fixing Patchy Eyeshadow
If your eyeshadow looks patchy, it means the color isn’t blending evenly. To fix this, use a clean blending brush and gently buff the edges of the eyeshadow until the color is diffused.
If you’ve applied too much color, use a makeup wipe to gently remove the excess and start again with a lighter hand.
- Clean Brush: Use a clean blending brush to buff out harsh lines.
- Lighter Hand: Apply eyeshadow with a lighter hand to avoid over-application.
- Patience: Take your time and blend in small, circular motions.
Blending takes patience, so don’t rush the process. Take your time and blend in small, circular motions until you achieve a seamless effect.
In brief, knowing how to identify and fix common blending issues ensures that your eyeshadow looks remain polished and professional, regardless of any challenges encountered.
| Key Point | Brief Description |
|---|---|
| 🎨 Use Quality Brushes | Invest in soft, fluffy blending brushes for seamless transitions. |
| ✨ Prime Eyelids | Apply eyeshadow primer to create a smooth, long-lasting base. |
| 🔄 Blend Circularly | Use gentle, circular motions to blend colors seamlessly. |
| 🌈 Layer Colors | Start with lighter shades and build up to darker ones for depth. |
Frequently Asked Questions
▼
A fluffy, tapered blending brush is ideal. Its soft bristles allow for seamless color diffusion, preventing harsh lines. Synthetic or natural bristles both work, depending on your preference.
▼
Start with a primer to create a smooth base. Apply eyeshadow in thin layers and blend continuously with a clean brush. Avoid applying too much product at once.
▼
While possible, brushes provide better control and precision. Fingers can be used for pressing shimmer shadows onto the lid, but blending is best achieved with brushes.
▼
Apply the lightest color first, then gradually apply darker shades, blending each layer before adding the next. Use small, circular motions to avoid harsh lines.
▼
Ideally, clean your brushes after each use to prevent bacteria buildup and ensure optimal blending. At least, aim to clean them once a week with a gentle brush cleanser.
Conclusion
Mastering the art of eyeshadow blending transforms your makeup routine, offering the ability to create professional, seamless looks. By understanding the techniques, investing in quality tools, and practicing regularly, you can achieve flawless eye makeup every time. Embrace the process, experiment with colors, and let your creativity shine!


