Smoky Eye Secrets: Mesmerizing Look All Night
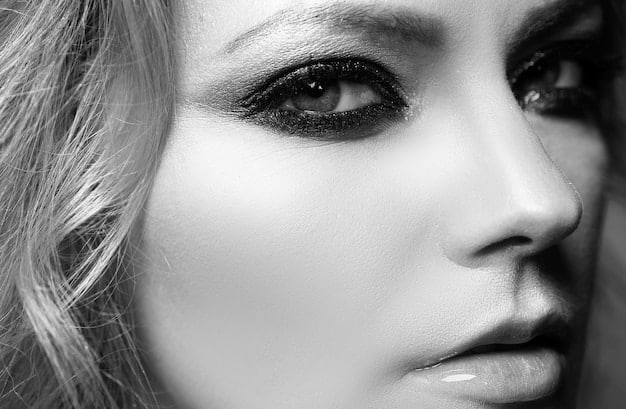
Smoky eye secrets involve layering eyeshadows, blending meticulously, and using complementary colors to create a captivating, long-lasting look suitable for any nighttime event.
Unlock the secrets to a captivating smoky eye that lasts all night. Whether you’re a makeup novice or a seasoned pro, these smoky eye secrets will help you achieve a mesmerizing look that turns heads.
Understanding the Basics of a Smoky Eye
Before diving into advanced techniques, mastering the basics is crucial. A smoky eye isn’t just about applying dark eyeshadow; it’s about creating a gradient of colors that blend seamlessly together.
Essential Tools for a Perfect Smoky Eye
Having the right tools can make all the difference. Investing in quality brushes and eyeshadows is the first step towards achieving a professional-looking smoky eye.
Here are some fundamental tools:
- Eyeshadow Brushes: A variety of brushes, including blending brushes, shader brushes, and pencil brushes.
- Eyeshadow Primer: To create a smooth base and prevent creasing.
- Eyeshadow Palette: A selection of neutral shades, ranging from light to dark.
- Eyeliner: A kohl or gel liner for defining the lash line.
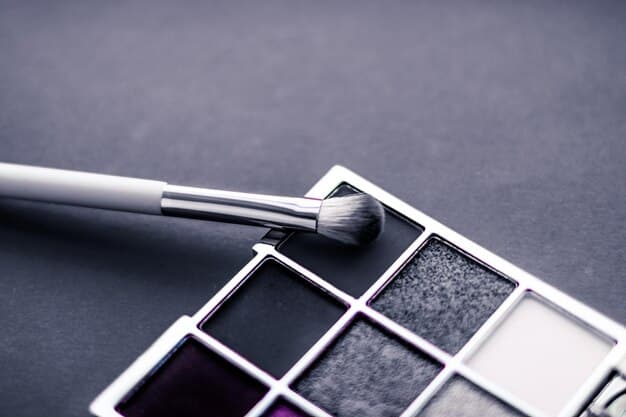
Using the right tools is key to success. Quality tools blend eyeshadows seamlessly, ensuring a smooth, professional finish.
Choosing the Right Colors for Your Skin Tone
The classic smoky eye typically involves shades of gray and black, but you can customize it to suit your skin tone. Experimenting with different colors can enhance your features and create a unique look.
Warm vs. Cool Tones
Understanding your skin tone is essential for choosing the right eyeshadow colors. Warm skin tones look great with bronze and gold shades, while cool skin tones shine with silver and purple hues.
Consider the following color palettes:
- Warm Tones: Bronze, copper, gold, and warm browns.
- Cool Tones: Silver, charcoal gray, deep blues, and purples.
- Neutral Tones: Most shades work well, but experiment to find your favorites.
Selecting the right shades can make your eyes pop. Match your eyeshadow colors to your skin tone for a harmonious and striking appearance.
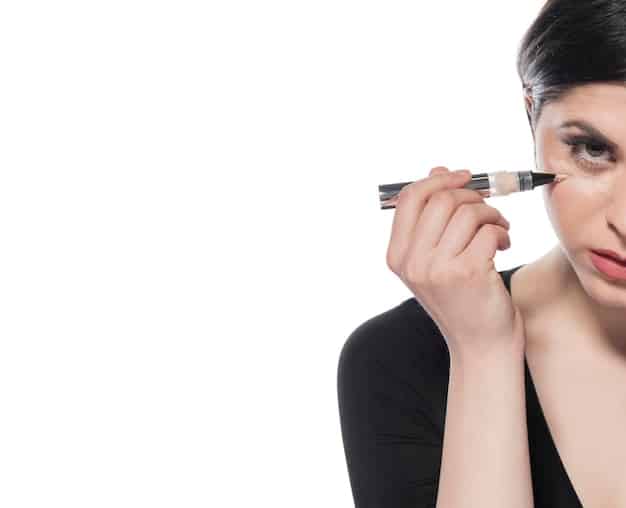
Step-by-Step Guide to Creating a Classic Smoky Eye
Achieving a classic smoky eye involves several steps, each equally important. From priming your lids to blending the eyeshadow, following these steps will help you nail the look.
Step 1: Prime Your Eyelids
Start by applying an eyeshadow primer to your eyelids. This will create a smooth base and prevent creasing. Let the primer dry for a minute before moving on to the next step.
Step 2: Apply a Base Color
Choose a light neutral shade and apply it all over your eyelid, from the lash line to the brow bone. This will create a smooth canvas for the darker shades.
Step 3: Add Depth with a Medium Shade
Apply a medium shade to your crease, blending it well with a blending brush. This will add depth and dimension to your eyes.
- Blend the eyeshadow in windshield wiper motions.
- Use a fluffy blending brush to soften the edges.
- Build up the color gradually for a seamless transition.
By following these steps, you’ll create the perfect base for your smoky eye. Layering and blending are key to achieving a professional look.
Advanced Techniques for a Long-Lasting Smoky Eye
Once you’ve mastered the basics, you can explore advanced techniques to make your smoky eye last all night. These tips and tricks will ensure your makeup stays fresh and vibrant.
Using Waterproof Products
Opt for waterproof eyeshadows and eyeliners to prevent smudging and fading. These products are designed to withstand sweat and oil, ensuring your smoky eye stays put.
Setting Your Eyeshadow with Powder
Set your eyeshadow with a translucent powder to lock in the color and prevent creasing. This will help prolong the wear of your smoky eye.
- Use a small brush to apply the powder to your eyelids.
- Gently pat the powder onto your skin, avoiding rubbing.
- Reapply throughout the night if needed.
Waterproof products and setting powders are essential for a long-lasting smoky eye. These steps help keep your makeup looking fresh and flawless.
Customizing Your Smoky Eye for Different Occasions
The versatility of a smoky eye allows you to customize it for various events. Whether it’s a casual night out or a formal gala, you can adapt the look to suit the occasion.
A Subtle Daytime Smoky Eye
For a more natural daytime look, use lighter shades and softer blending techniques. Avoid harsh lines and opt for a more diffused finish.
A Dramatic Evening Smoky Eye
For a dramatic evening look, use darker shades and bolder eyeliner. Add glitter or shimmer for an extra touch of glamour.
- Use black or dark brown eyeshadow for a classic smoky eye.
- Add a pop of color, such as purple or blue, for a unique twist.
- Experiment with different eyeliner styles, such as winged or smudged.
Tailoring your smoky eye to the occasion is key to creating the perfect look. From subtle daytime glam to dramatic evening allure, the possibilities are endless.
Correcting Common Smoky Eye Mistakes
Even experienced makeup artists make mistakes. Knowing how to correct common smoky eye errors can save you time and frustration.
Fixing Fallout
Fallout is when eyeshadow particles drop onto your face. To fix this, use a large, fluffy brush to gently sweep away any excess powder.
Dealing with Uneven Blending
Uneven blending can make your smoky eye look messy. Use a clean blending brush to soften any harsh lines and create a seamless transition.
- Use small, circular motions to blend the eyeshadow.
- Hold the brush at the end for a lighter touch.
- Take your time and blend until you achieve the desired effect.
Correcting mistakes is a part of the makeup process. With a few simple techniques, you can fix any errors and achieve a flawless smoky eye.
| Key Point | Brief Description |
|---|---|
| 🎨 Primer & Base | Essential for smooth application and preventing creasing. |
| 🖌️ Blending is Key | Seamlessly transition shades for a professional look. |
| 💧 Waterproof Products | Prevents smudging and extends wear time. |
| ✨ Color Choice | Tailor shades to skin tone for a flattering look. |
[FAQ Section]
Frequently Asked Questions
▼
Use a fluffy blending brush and apply the eyeshadow in windshield wiper motions. Hold the brush at the end for a lighter touch and blend until there are no harsh lines.
▼
Start with an eyeshadow primer to create a smooth base. Set your eyeshadow with a translucent powder to lock in the color and prevent creasing throughout the day or night.
▼
Yes, absolutely! Experiment with different colors to suit your skin tone and personal style. Warm tones like bronze and gold work well for warm skin tones, while cool tones like silver and purple enhance cool skin tones.
▼
Kohl or gel eyeliner is ideal for a smoky eye because they are easy to smudge and blend. This helps create a seamless transition between the eyeliner and eyeshadow.
▼
Use a large, fluffy brush to gently sweep away any excess eyeshadow particles. You can also use a makeup wipe to carefully clean up the fallout without disturbing the rest of your makeup.
Conclusion
Mastering the smoky eye secrets can transform your makeup game, providing a versatile look for any occasion. By understanding the basics, choosing the right colors, and practicing these techniques, you can achieve a mesmerizing smoky eye that lasts all night.


