The Ultimate Guide to Baking Makeup: Achieve a Perfect Finish
The Ultimate Guide to Baking Your Makeup: Achieve a Flawless and Long-Lasting Finish delves into the technique of baking, a process involving applying a generous layer of translucent powder to specific areas of the face, allowing it to sit and “bake” with the skin’s natural heat, and then dusting it away for a smooth, crease-free finish.
Want to achieve a flawless, long-lasting makeup look? The Ultimate Guide to Baking Your Makeup: Achieve a Flawless and Long-Lasting Finish is here to demystify this transformative technique. Get ready to unlock the secrets to a perfectly set and radiant complexion.
What is Makeup Baking and Why Do It?
Makeup baking is a technique used to set your makeup for an extended period, creating a smooth, flawless base. It’s a favorite among makeup artists and beauty enthusiasts alike, known for its ability to brighten and highlight while preventing creasing.
But why go through the extra step of baking? Let’s explore the core benefits:
Benefits of Baking
Baking isn’t just another trend. It offers tangible advantages for your makeup routine.
- Long-Lasting Makeup: Properly baked makeup is less prone to fading or smudging throughout the day.
- Crease-Free Finish: The baking process helps prevent concealer from settling into fine lines and wrinkles.
- Brightened Complexion: Strategically placed powder highlights and brightens specific areas of the face.
- Smooth Texture: Baking can minimize the appearance of pores and create a smoother canvas for makeup application.
In essence, baking is about creating a polished, professional makeup look that lasts. It’s particularly beneficial for those with oily skin or anyone looking for extra staying power.
Essential Products for Baking Your Makeup
To successfully bake your makeup, you’ll need the right tools and products. Quality is key, as the products used directly affect the final result.
Let’s break down the essentials:
Must-Have Products
The following products are integral to the baking process and will help you achieve optimal results.
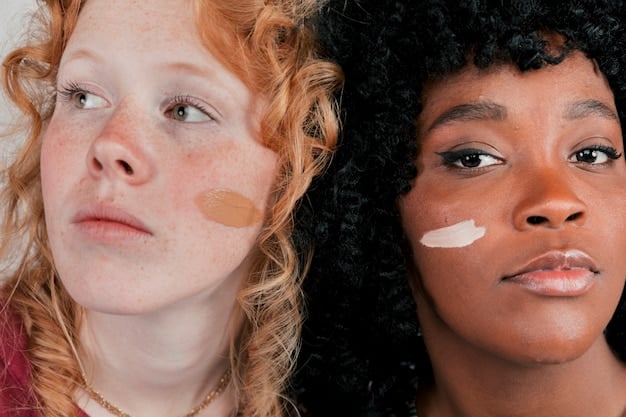
- Creamy Concealer: Choose a hydrating concealer that’s one to two shades lighter than your skin tone. This will help brighten the under-eye area.
- Translucent Powder: A finely-milled translucent powder is crucial for baking. Avoid powders with added color, as they can alter your foundation shade.
- Makeup Sponge: A damp makeup sponge is ideal for pressing the powder into the skin. Look for a soft, dense sponge for even application.
- Fluffy Brush: A large, fluffy brush is needed to dust away the excess powder after baking.
- Setting Spray: A setting spray helps meld all the products together for a seamless finish.
Don’t skimp on quality with these products. Investing in well-formulated items can make all the difference in your final makeup look. Now, let’s delve into the baking process step by step.

Step-by-Step Guide to Baking Your Makeup
Now that you have all the essential products, let’s walk through the baking process. Each step is important for achieving that flawless finish.
Here’s a detailed breakdown:
Prepping Your Skin
Proper skin prep is paramount for a successful makeup application. A well-hydrated base ensures the makeup adheres smoothly and lasts longer.
- Cleanse and Moisturize: Start with a clean, moisturized face. Use a gentle cleanser followed by a hydrating moisturizer suitable for your skin type.
- Apply Primer: Use a primer to create a smooth canvas and help your makeup stay in place. A pore-filling primer can further enhance the results.
Applying Concealer
Concealer is the next step; apply in specific areas to brighten and conceal.
- Apply Concealer: Use a creamy concealer that is one to two shades lighter than your skin tone. Apply it under your eyes in an inverted triangle shape, as well as on any other areas you want to brighten, such as the bridge of your nose and the center of your forehead.
- Blend Thoroughly: Use a damp makeup sponge to gently blend the concealer. Make sure it’s seamlessly integrated into your foundation.
Baking with Translucent Powder
This is where the magic happens.
- Apply Powder Generously: Use the same damp makeup sponge to pick up a generous amount of translucent powder. Press the powder over the areas where you applied concealer, creating a thick layer.
- Let It Bake: Let the powder sit on your skin for 5-10 minutes. The heat from your face will “bake” the makeup, setting it in place.
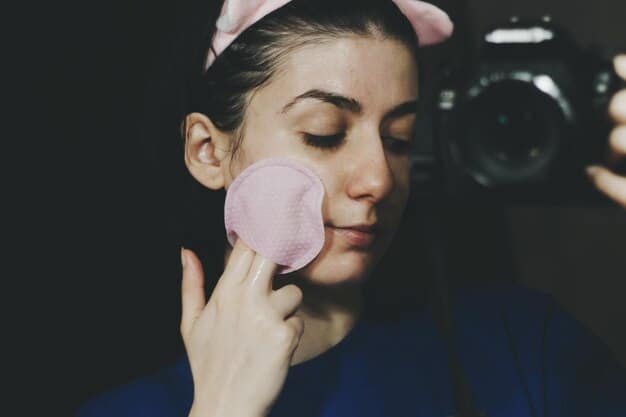
Dusting Off Excess Powder
Once the “baking” is complete, it’s time to remove the excess powder. Being gentle here prevents disrupting the underlying makeup.
- Dust Away Excess: Use a large, fluffy brush to gently dust away the excess powder. Use circular motions to buff the skin and blend any harsh lines.
- Setting Spray: Finish with a setting spray to meld all the products together for a seamless, long-lasting finish.
Following these steps will help you achieve a beautifully baked makeup look that lasts all day. But what about troubleshooting? Let’s discuss potential issues and how to address them.
Troubleshooting Common Baking Mistakes
Even with a detailed guide, mistakes can happen. Recognizing and addressing these common pitfalls is crucial for perfecting your baking technique.
Let’s explore some common issues and how to resolve them:
Caking or Dryness
One of the most common issues with baking is ending up with a cakey or dry appearance. This often occurs due to using too much powder or having dry skin to begin with.
- Solution: Use a hydrating moisturizer and primer before applying any makeup. Apply the translucent powder sparingly and focus only on the areas that need it most. Opt for a hydrating setting spray to replenish moisture.
Flashback in Photos
Flashback occurs when the powder reflects light in photos, creating a white cast. This is often caused by using the wrong type of powder.
- Solution: Use a silica-based translucent powder specifically designed for baking. Avoid powders that contain talc, as they are more likely to cause flashback.
Uneven Application
An uneven powder application can result in a patchy or inconsistent finish.
- Solution: Use a damp makeup sponge to ensure the powder is evenly distributed. Gently press the powder into the skin rather than swiping it.
Powder Settling into Fine Lines
If you’re noticing powder settling into fine lines and wrinkles, it means the under-eye area isn’t hydrated enough or too much powder was applied.
- Solution: Always hydrate the under-eye area with a good eye cream before applying makeup. Use a light hand when applying the translucent powder and dust away any excess thoroughly.
By addressing these common issues, you’ll be better equipped to achieve a flawless baked makeup look every time. Next, let’s discuss how to adapt this technique for different skin types.
Adapting Baking for Different Skin Types
Baking isn’t a one-size-fits-all technique. Tailoring it to your specific skin type is essential for achieving the best results.
Here’s how to adjust the baking process for different skin types:
Oily Skin
For oily skin, baking can be a lifesaver. It helps control excess oil and keeps makeup in place for longer.
- Technique: Use a generous amount of translucent powder, focusing on the T-zone and any other areas prone to oiliness. Let the powder bake for the full 10 minutes to absorb excess oil.
- Product Recommendation: Opt for a mattifying translucent powder that will help control shine throughout the day.
Dry Skin
If you have dry skin, baking may seem counterintuitive, but it can still work with the right approach.
- Technique: Focus on hydrating the skin thoroughly before applying any makeup. Use a minimal amount of translucent powder and only bake for 3-5 minutes.
- Product Recommendation: Choose a hydrating or moisturizing translucent powder to prevent further drying out the skin.
Combination Skin
Combination skin requires a balanced approach. Address the oily areas while hydrating the dry ones.
- Technique: Apply a moderate amount of translucent powder to the T-zone, baking for 5-7 minutes. Use a lighter hand on the drier areas of the face.
- Product Recommendation: Use a balanced translucent powder that isn’t too mattifying or too hydrating.
Remember, the key to successfully baking your makeup, regardless of your skin type, is to listen to your skin and adapt the technique accordingly. Let’s delve into alternatives to baking.
Alternatives to Traditional Baking
While baking is a popular technique, it may not be for everyone. Luckily, there are several alternatives that can provide similar benefits without the potential drawbacks.
Here are some alternatives to consider:
- Setting Powder: Instead of baking with a large amount of powder, use a light dusting of setting powder to set your makeup. This provides a more natural finish while still helping to prevent creasing.
- Setting Spray: A good setting spray can lock in your makeup and prevent it from moving throughout the day. Look for a long-lasting or oil-control formula for added staying power.
- Powder Foundation: Using a powder foundation can help set your makeup and control oil without the need for baking. Apply it with a brush or sponge for a smooth, even finish.
Each of these alternatives offers a unique approach to setting your makeup, catering to different preferences and skin types. Experiment with these options to find what works best for you. Mastering the ultimate guide to baking your makeup: achieve a flawless and long-lasting finish means also understanding when to use alternatives like these. And let’s get a quick recap with the following table summary.
| Key Point | Brief Description |
|---|---|
| ✨ Proper Skin Prep | Cleanse, moisturize, and prime your skin before applying makeup. |
| ⏳ Baking Time | Allow the powder to sit for 5-10 minutes, depending on skin type. |
| 🧴 Product Choice | Use a finely-milled translucent powder for best results. |
| 🧽 Application | Apply powder generously with a damp makeup sponge. |
Frequently Asked Questions (FAQ)
▼
While baking can work for various skin types, adjustments are needed. Oily skin benefits most, while dry skin requires extra hydration and less powder. Combination skin needs a balanced approach.
▼
Baking itself doesn’t directly cause acne, but using comedogenic products or not cleansing properly afterward can. Always use non-comedogenic powders and ensure thorough makeup removal.
▼
The ideal baking time varies. Oily skin can handle 10 minutes, while dry skin might only need 3-5 minutes. Monitor your skin’s reaction and adjust accordingly to prevent dryness.
▼
Finely-milled translucent powders are best. Avoid tinted powders to prevent altering your foundation shade. Silica-based powders are great for preventing flashback in photos.
▼
Baking is best reserved for special occasions due to its intensity. Daily baking can dry out the skin. For everyday looks, consider lighter setting techniques like setting spray.
Conclusion
Mastering the art of makeup baking can elevate your makeup game, providing a flawless, long-lasting finish. By understanding the techniques, adapting to your skin type, and avoiding common mistakes, you can achieve a professional makeup look that stands the test of time. Whether you’re aiming for a red-carpet-ready appearance or simply want your makeup to last through a long day, baking is a valuable tool to have in your beauty arsenal.


