Mastering Soft Sculpt: 2026’s Natural Contour & Highlight Guide
Mastering the ‘soft sculpt’ trend involves creating natural-looking contours and highlights using subtle techniques and modern products, enhancing facial features without harsh lines.
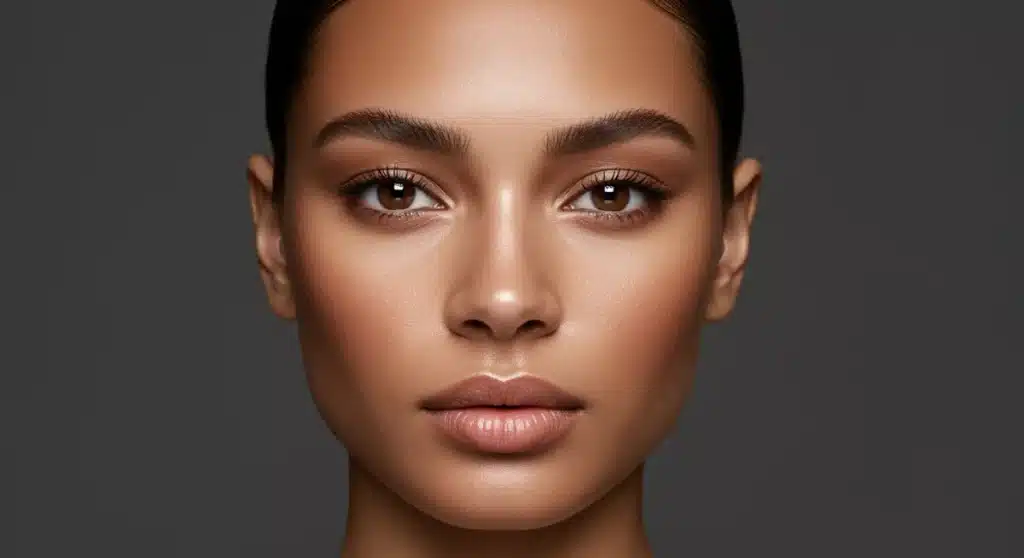
Welcome to the future of facial definition! In 2026, the beauty world is all about enhancing our natural features rather than masking them. The ‘soft sculpt’ trend has emerged as the quintessential technique for achieving this, offering a sophisticated yet effortless approach to contouring and highlighting. Forget harsh lines and overly dramatic shadows; this method focuses on subtle dimension, creating a luminous, healthy glow that appears entirely innate. If you’re ready to elevate your makeup game and embrace a more refined aesthetic, you’ve come to the right place. This comprehensive guide will walk you through everything you need to know about Mastering the ‘Soft Sculpt’ Trend: A Step-by-Step 2026 Tutorial for Natural-Looking Contours and Highlights, ensuring you achieve that coveted, naturally sculpted look with ease.
Understanding the ‘Soft Sculpt’ Philosophy in 2026
The ‘soft sculpt’ trend isn’t just another passing fad; it’s a fundamental shift in how we approach facial definition. In 2026, beauty emphasizes individuality and a celebration of natural contours. This technique moves away from the heavy contouring popularized in previous years, opting instead for a more diffused, blended, and ultimately, believable enhancement. It’s about working with your bone structure, using light and shadow to create a subtle illusion of depth and lift, rather than drawing new lines entirely.
This philosophy extends beyond just the application; it influences product choices and even the tools we use. The goal is a seamless finish, where no makeup is visibly sitting on the skin, but rather melts into it, creating an almost airbrushed effect. The focus is on luminosity and a healthy glow, making the skin look vibrant and youthful. It’s an elegant evolution of makeup, perfect for those who desire a polished look without appearing overly made up.
The Evolution of Contouring and Highlighting
Contouring and highlighting have seen significant transformations over the years. From the dramatic stage makeup techniques of the past to the more refined approaches of today, each era brings its own interpretation. The ‘soft sculpt’ is the natural progression, reflecting a broader cultural shift towards authenticity and understated elegance. It acknowledges that beauty isn’t about conformity, but about enhancing what makes each individual unique.
- Past Trends: Characterized by stark lines, heavy creams, and noticeable definitions.
- Current Shift: Focus on seamless blending, natural finishes, and subtle enhancements.
- Product Innovation: Development of sheer, buildable formulas that mimic natural skin.
- Tool Advancement: Introduction of softer, more precise brushes and sponges for diffused application.
Ultimately, the ‘soft sculpt’ is about confidence in your natural beauty, amplified by strategic application of makeup. It’s a technique that empowers you to look and feel your best, without losing touch with your authentic self. The results are undeniable: a refreshed, sculpted appearance that radiates health and sophistication.
Essential Tools and Products for a Flawless Soft Sculpt
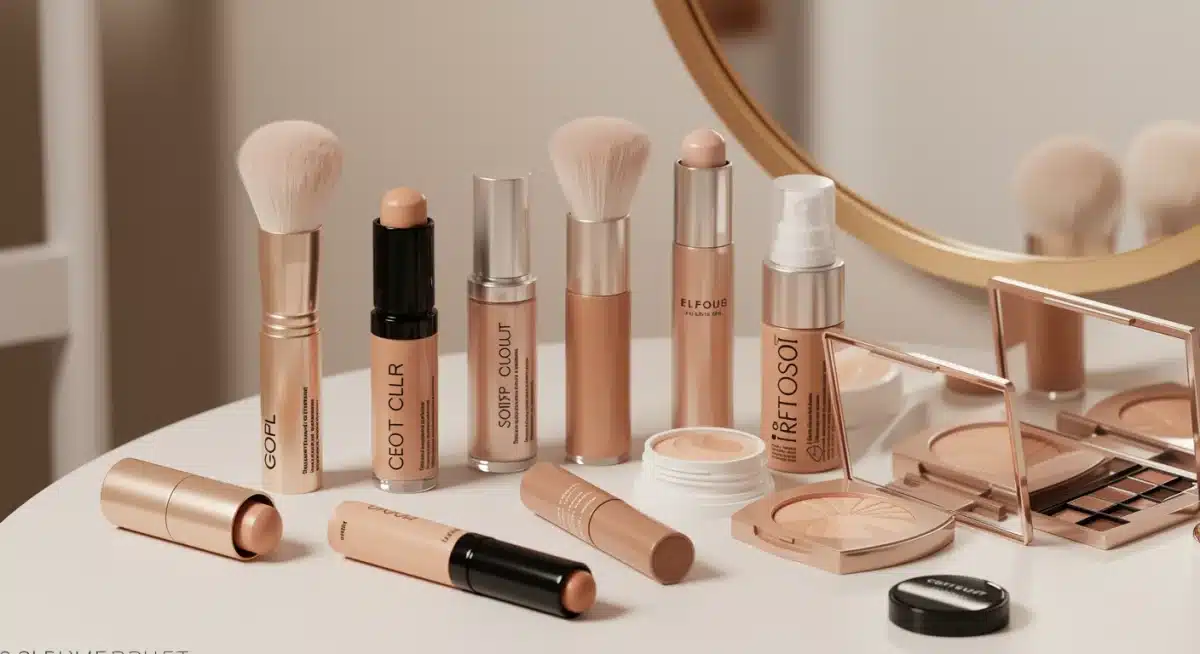
Achieving a truly natural ‘soft sculpt’ look hinges significantly on selecting the right tools and products. In 2026, the market is saturated with innovative formulas designed specifically for this subtle approach. Gone are the days of heavy, opaque creams; instead, we’re embracing sheer, buildable, and skin-like textures that blend effortlessly. The goal is to create dimension without visible makeup, making product choice paramount.
Consider your skin type and tone when making selections. For instance, those with oily skin might prefer powder-based contours and highlights, while dry skin types will benefit from hydrating cream or liquid formulas. Regardless, the key is to ensure products are non-comedogenic and provide a natural finish that doesn’t settle into fine lines or pores.
Choosing Your Contour Products
The foundation of any good sculpt is the contour shade. For the ‘soft sculpt’ trend, it’s crucial to select a shade that mimics a natural shadow on your skin. This means opting for cool-toned, ashy browns rather than warm, orange-toned bronzers. Bronzers are great for adding warmth, but a true contour creates depth.
- Cream Sticks: Offer precise application and blend beautifully into the skin for a seamless finish. Look for shades that are one to two shades darker than your natural skin tone.
- Liquid Contours: Provide a very natural, dewy finish and are excellent for dry or mature skin. Apply sparingly and blend quickly.
- Powder Contours: Ideal for oily skin types or for setting cream products. Choose finely milled powders that don’t look chalky.
- Avoid: Anything too warm, too dark, or overly shimmery. The idea is shadow, not sparkle.
Selecting Your Highlighter
Highlighters for the ‘soft sculpt’ should provide a radiant, lit-from-within glow, not an obvious stripe of glitter. The trend favors subtle luminosity that catches the light naturally, enhancing high points of the face without appearing artificial. Think healthy skin, not disco ball.
- Liquid Highlighters: Versatile and blendable, they offer a natural, dewy sheen. Can be mixed with foundation or applied directly.
- Cream Highlighters: Provide a soft, diffused glow that looks like skin. Easy to apply with fingers or a brush.
- Powder Highlighters: For those who prefer a more intense, yet still refined, glow. Apply with a light hand.
- Shade Matching: Choose shades that complement your skin tone – champagne or pearly tones for fair skin, golden or bronze for medium to deep skin.
Beyond the products themselves, the tools you use for application are equally important. Fluffy, synthetic brushes are excellent for blending cream and liquid products, while smaller, denser brushes can offer more precision. A damp beauty sponge is also invaluable for seamless blending and pressing products into the skin for a natural finish. Remember, the right combination of products and tools will ensure your ‘soft sculpt’ is undetectable and effortlessly beautiful.
Preparing Your Skin: The Canvas for Soft Sculpt
Before any makeup application, especially for a technique as nuanced as ‘soft sculpt,’ proper skin preparation is non-negotiable. Your skin is the canvas, and a well-prepped canvas ensures that products blend seamlessly, last longer, and contribute to that coveted natural, radiant finish. This step is about creating a smooth, hydrated, and even surface, allowing the contour and highlight to truly melt into the skin rather than sitting on top of it.
In 2026, skincare and makeup are more intertwined than ever, with many products offering hybrid benefits. Investing time in a good skincare routine will not only improve the look of your makeup but also the health of your skin in the long run. Remember, the ‘soft sculpt’ celebrates natural beauty, and healthy skin is the ultimate foundation.
Hydration is Key
Well-hydrated skin not only looks plumper and more youthful but also provides a better grip for makeup, preventing it from looking patchy or caking. Hydration also helps products glide on smoothly, which is essential for seamless blending.
- Cleanse: Start with a gentle cleanser to remove impurities without stripping the skin.
- Tone: Use a hydrating toner to balance pH and prep the skin for subsequent products.
- Serum: Apply a hydrating serum (e.g., hyaluronic acid) to deeply moisturize and plump the skin.
- Moisturize: Finish with a lightweight, non-greasy moisturizer appropriate for your skin type. Allow it to fully absorb before moving to the next step.
Priming for Perfection
A good primer creates a barrier between your skin and makeup, blurring imperfections, minimizing pores, and extending wear time. For ‘soft sculpt,’ choose a primer that aligns with your skin’s needs and the desired finish.
- Hydrating Primers: Excellent for dry or normal skin, adding an extra layer of moisture and a dewy finish.
- Blurring Primers: Ideal for minimizing the appearance of pores and fine lines, creating a smoother canvas.
- Radiance-Boosting Primers: Infused with subtle shimmer, these primers can add an overall luminosity, enhancing the ‘soft sculpt’ effect.
- Mattifying Primers: Best for oily skin types, controlling shine in areas prone to oiliness, such as the T-zone.
By dedicating time to proper skin preparation, you’re not just ensuring your makeup looks good; you’re also nourishing your skin. This holistic approach is central to the ‘soft sculpt’ trend and the broader beauty philosophy of 2026, where healthy, radiant skin is always in style. A well-prepped face will make the contouring and highlighting steps much easier and the results far more impactful and natural-looking.
Step-by-Step Guide to Applying Soft Contour
The art of soft contouring lies in its subtlety. Unlike traditional contouring that can be quite stark, soft contour aims to mimic natural shadows, creating depth and definition that looks inherent to your bone structure. This step-by-step guide will help you achieve that coveted, natural-looking sculpt, ensuring your features are enhanced without any visible lines or harshness. Remember, less is often more with this technique, and blending is your best friend.
Before you begin, ensure you have chosen a cool-toned contour product that is one to two shades darker than your natural skin tone. Cream or liquid formulas are often preferred for their seamless blendability, but a finely milled powder can also work beautifully, especially for oily skin types. Good lighting is also crucial to see how the product is laying on your skin.
Mapping Your Face for Natural Shadows
Understanding where natural shadows fall on your face is the first step. This isn’t about creating new shadows, but rather enhancing existing ones. The key areas for contour are typically the hollows of your cheeks, your jawline, temples, and sometimes the sides of your nose.
- Cheekbones: Locate the hollows by sucking in your cheeks slightly. Apply product just beneath the cheekbone, starting from the ear and stopping before the corner of your mouth.
- Jawline: Apply a thin line of contour along your jawbone, extending from just below your ear down to your chin. This helps to define and sharpen the jaw.
- Temples: Lightly apply contour along your hairline and temples to create a subtle narrowing effect on your forehead, blending into your hairline.
- Nose (Optional): For a subtle nose sculpt, apply two thin lines down the sides of your nose, starting from the inner corner of your eyebrow.
The Art of Blending
Blending is arguably the most critical step in achieving a soft sculpt. Any visible lines will detract from the natural effect. Dedicate sufficient time to this stage, using the right tools to diffuse the product seamlessly into your skin.
- Tools: Use a fluffy synthetic brush, a damp beauty sponge, or even your fingertips for cream and liquid products. For powders, a soft, angled contour brush works best.
- Technique: Use light, circular motions or gentle tapping (dabbing) motions to blend the product. Always blend upwards and outwards, lifting the face rather than dragging it down.
- Seamless Transition: Ensure there are no harsh edges. The contour should gradually fade into your natural skin tone or foundation, creating a smooth transition.
- Check Lighting: Step back from your mirror and check your blending in different lighting conditions to ensure it looks natural from all angles.
By following these steps, you’ll create a soft, natural-looking contour that enhances your facial structure without appearing heavy or artificial. The goal is an effortless definition that complements your features, embodying the sophisticated essence of the ‘soft sculpt’ trend for 2026.
Achieving Natural Highlights: The Luminous Touch
Once your soft contour is in place, the next step in mastering the ‘soft sculpt’ trend is to introduce natural highlights. Highlighting is about bringing light to the high points of your face, where light would naturally hit, creating a luminous, healthy glow. The key here is not to create an obvious streak of shimmer, but rather a subtle radiance that looks like it’s emanating from within your skin. This technique is designed to complement the contour, lifting and brightening the face for a harmonious, sculpted effect.
For the ‘soft sculpt,’ choose highlighters with a finely milled texture, whether liquid, cream, or powder. Avoid anything with chunky glitter, as this will counteract the natural aesthetic we are aiming for. The goal is a dewy, reflective finish that enhances your natural bone structure.
Strategic Placement for a Lit-From-Within Glow
The placement of your highlighter is crucial for achieving a natural look. Focus on the areas of your face that naturally catch the light, enhancing your features without overdoing it. A little product goes a long way in creating impact.
- Cheekbones: Apply highlighter to the very tops of your cheekbones, just above where you placed your contour. Blend upwards towards your temples for a lifted effect.
- Brow Bone: A touch of highlighter just under the arch of your eyebrow can instantly lift and open up the eye area.
- Inner Corner of the Eye: A tiny dab in the inner corner of your eyes can brighten your entire face and make you look more awake.
- Cupid’s Bow: Applying a small amount to the cupid’s bow (the ‘V’ shape above your upper lip) can make your lips appear fuller and more defined.
- Bridge of the Nose (Optional): For a subtle enhancement, a thin line down the bridge of your nose can make it appear straighter and more refined. Avoid the tip of the nose for a soft sculpt.
Blending for Seamless Radiance
Just like contouring, blending is paramount for highlighting. The highlighter should seamlessly melt into your skin, creating an ethereal glow rather than a distinct line of shimmer. Use soft, gentle motions to diffuse the product.
- Tools for Application: For liquid or cream highlighters, your fingertips, a damp beauty sponge, or a small, fluffy synthetic brush work wonders. For powder highlighters, a fan brush or a small, tapered brush is ideal.
- Technique: Gently tap or pat the product onto the skin, then use light, circular or sweeping motions to blend it out. The edges should be completely diffused.
- Layering: If you desire more intensity, build up the highlight in thin layers rather than applying a large amount all at once. This allows for better control and a more natural finish.
- Natural Light Check: Always check your highlight in natural light to ensure it looks seamless and radiant, not glittery or harsh.
By carefully placing and blending your highlighter, you’ll achieve a luminous finish that perfectly complements your soft contour. This combination creates a harmonious sculpt that enhances your natural beauty, leaving you with a radiant, polished look that is perfectly aligned with the sophisticated aesthetic of 2026.
Troubleshooting and Tips for Mastering Soft Sculpt
Even with the best intentions and products, mastering any new makeup technique can come with its challenges. The ‘soft sculpt’ trend, while aiming for naturalness, still requires precision and a good understanding of application. This section addresses common pitfalls and provides expert tips to ensure your soft sculpt is always flawless, seamlessly blended, and truly enhances your features. Remember, practice makes perfect, and understanding these nuances will significantly improve your results.
One of the most frequent issues encountered is over-application or improper blending, leading to a less-than-natural finish. It’s crucial to approach the ‘soft sculpt’ with a light hand and a commitment to diffusion. Always remember that makeup should enhance, not overpower, your natural beauty. Adjusting your technique to your individual face shape and skin type is also key to success.
Common Soft Sculpt Challenges and Solutions
Identifying and addressing common problems can transform your soft sculpt application from good to exceptional. Many issues stem from product choice or application technique.
- Problem: Harsh Lines: This is usually a blending issue or using too much product.
- Solution: Use less product, starting with a tiny amount and building up. Dedicate more time to blending with a damp sponge or a fluffy brush, using tapping motions to diffuse edges.
- Problem: Muddy or Patchy Look: Often caused by applying contour over unblended foundation or incompatible product formulas.
- Solution: Ensure your base makeup is fully blended and set (if powder) or still slightly dewy (for cream/liquid). Use products with similar bases (e.g., all cream or all powder) or ensure cream products are fully absorbed before powder.
- Problem: Contour is Too Warm or Orange: This means your contour shade is not cool-toned enough.
- Solution: Invest in a cooler-toned, ashier contour shade. Remember, contour mimics shadow, which is naturally cool.
- Problem: Highlight is Too Glittery: The product contains too much chunky glitter, or it’s applied too heavily.
- Solution: Opt for highlighters with a finer, more luminous shimmer. Apply a very small amount and blend thoroughly for a ‘lit-from-within’ glow.
Pro Tips for an Elevated Soft Sculpt
Beyond troubleshooting, there are several advanced tips that can elevate your soft sculpt game, making it even more refined and long-lasting. These insights come from years of experience in makeup artistry and are tailored for the 2026 beauty landscape.
- Layering Technique: For increased longevity and depth, try layering. Apply a sheer cream contour, blend, then lightly set with a matching powder contour. Do the same for highlighter.
- Custom Blending: Experiment with different tools. Sometimes a combination of a brush for initial placement and a sponge for final blending yields the best results.
- Minimal Base: The ‘soft sculpt’ truly shines on a relatively minimal base. If you use heavy foundation, it can obscure the subtle definition. Opt for lighter foundations or tinted moisturizers.
- Setting Spray: A good setting spray will not only lock your makeup in place but can also help meld all the products together, creating a more seamless, skin-like finish. Choose a hydrating or radiant setting spray for an extra glow.
- Observe Natural Shadows: When in doubt, observe where natural shadows fall on your face in different lighting. This is your ultimate guide for contour placement.
By understanding these common issues and implementing these expert tips, you’ll be well on your way to mastering the ‘soft sculpt’ trend. It’s a journey of experimentation and refinement, but the payoff is a beautifully enhanced, natural-looking complexion that is effortlessly chic and perfectly modern for 2026.
Maintaining Your Soft Sculpt: Longevity and Touch-Ups
Achieving the perfect ‘soft sculpt’ is only half the battle; ensuring it lasts throughout your day is equally important. The natural, seamless nature of this trend means that any fading or smudging can become more noticeable, detracting from the desired effect. This section focuses on techniques and products that will help maintain your soft sculpt, keeping your contours defined and your highlights luminous from morning to night, with minimal effort.
Longevity for makeup in 2026 is often about smart product choices and strategic application. It’s not about caking on layers, but rather using products that are designed for extended wear and applying them in a way that maximizes their staying power. Environmental factors like humidity and your skin type also play a significant role, so tailoring your approach is key.
Setting Your Sculpt for Extended Wear
Setting your makeup is a crucial step for extending its wear time, especially for a detailed look like the ‘soft sculpt.’ This helps to lock in your cream and liquid products, preventing them from migrating or fading throughout the day.
- Translucent Setting Powder: Lightly dust a finely milled translucent setting powder over your contoured and highlighted areas. Focus on areas prone to creasing or shine, using a fluffy brush for a diffused application.
- Targeted Powdering: Instead of powdering your entire face, target specific zones. For instance, lightly powder the areas where you contoured and any areas where you tend to get oily, leaving the high points of your face dewy.
- Setting Spray: A good setting spray is your best friend for longevity. Choose a hydrating or radiant-finish setting spray to meld all the products together, remove any powdery finish, and lock everything in place without looking stiff. Mist generously from an arm’s length away.
- Baking (Optional for Oily Skin): For those with very oily skin, a light bake under the eyes and along the jawline can provide extra staying power. Apply a generous amount of powder, let it sit for a few minutes, then brush off the excess.
Quick Touch-Ups On-The-Go
Even with the best setting techniques, life happens, and a quick touch-up might be necessary, especially if you have a long day ahead. The goal for touch-ups is to refresh your look without disturbing your existing makeup or adding too much product.
- Blotting Papers: For oily skin, blotting papers are essential to absorb excess oil without adding more product. Gently press them onto oily areas.
- Powder Compact: A compact with a finely milled translucent or skin-toned powder can be used to lightly refresh areas that have become shiny. Apply with a puff or small brush.
- Mini Highlighter Stick: A small cream or stick highlighter can be dabbed onto the high points of your cheekbones and blended with a fingertip for an instant radiance boost.
- Small Contour Brush and Powder: If your contour has faded significantly, a small, angled brush with a tiny amount of powder contour can be used to gently re-define. Blend meticulously.
- Hydrating Mist: A travel-sized hydrating facial mist can refresh your makeup and re-energize your skin, making everything look fresh and dewy again.
By incorporating these setting and touch-up strategies, your ‘soft sculpt’ will remain impeccable throughout the day, ensuring you maintain that natural, polished radiance. The key is to be proactive with setting and precise with touch-ups, preserving the effortless beauty of this 2026 trend.
| Key Aspect | Brief Description |
|---|---|
| Soft Sculpt Philosophy | Enhances natural features with subtle dimension, moving away from harsh lines. |
| Product Selection | Opt for sheer, buildable, cool-toned contours and luminous, finely milled highlighters. |
| Application Technique | Focus on light application and extensive blending for seamless, natural results. |
| Longevity & Care | Set with powder and spray, use blotting papers and minimal product for touch-ups. |
Frequently Asked Questions About Soft Sculpting
Traditional contouring often involves starker lines and more dramatic shadows to reshape features. Soft sculpting, however, focuses on subtle enhancements, using diffused shadows and highlights to emphasize existing bone structure for a natural, seamless definition that blends into the skin.
For soft sculpting, cream or liquid contour and highlight products are often preferred due to their blendability and natural finish. Look for cool-toned contour shades and finely milled, luminous highlighters that provide a dewy, non-glittery glow. Sheer, buildable formulas are key.
Choose a contour shade that is one to two shades darker than your natural skin tone and has cool, ashy undertones. This mimics a natural shadow. Avoid warm or orange-toned bronzers, as they add warmth rather than creating depth and definition for contouring.
Yes, powder products can be used for soft sculpting, especially for oily skin types or for setting cream products. The key is to use very finely milled powders and apply them with a light hand and soft, fluffy brushes to ensure a diffused and natural finish without looking chalky or heavy.
Blending is arguably the most crucial step for a flawless soft sculpt. Seamlessly diffusing your contour and highlight products into your skin ensures there are no harsh lines, creating an undetectable, natural-looking dimension. Dedicate ample time and use appropriate tools for thorough blending.
Conclusion
As we navigate the ever-evolving landscape of beauty in 2026, the ‘soft sculpt’ trend stands out as a testament to the enduring appeal of natural elegance. This comprehensive guide has walked you through every facet of Mastering the ‘Soft Sculpt’ Trend: A Step-by-Step 2026 Tutorial for Natural-Looking Contours and Highlights, from understanding its philosophy to selecting the right products, preparing your skin, and executing flawless application. The essence of soft sculpting lies in its ability to enhance rather than conceal, celebrating your unique facial architecture with subtle depth and radiant light. By embracing this technique, you not only achieve a polished, refined look but also foster a deeper appreciation for your inherent beauty. Practice, patience, and a commitment to seamless blending are your allies in this journey. Step into the future of makeup with confidence, knowing you can achieve a luminous, naturally sculpted appearance that is both timeless and perfectly aligned with the sophisticated aesthetic of today.


