
Tired of makeup that feels heavy or looks unnatural? The beauty world is currently buzzing about cream contour and highlight, and for good reason. These versatile formulas are revolutionizing how we sculpt and illuminate our faces, offering a fresh, skin-like finish that powders often struggle to achieve. If you’ve ever felt intimidated by contouring or found your highlight looking too stark, cream products might just be the major shift you need to unlock a more radiant, effortless look.
For years, powder products dominated the contour and highlight scene, promising chiseled cheekbones and a luminous glow. as beauty trends evolve towards a more natural aesthetic, cream formulas have stepped into the spotlight. Their ability to melt seamlessly into the skin, providing a dewy and youthful appearance, resonates deeply with a desire for makeup that enhances rather than masks. This shift isn’t just about a new product type; it’s about embracing a technique that feels more intuitive and forgiving, especially for those new to the art of facial sculpting.
This guide is designed to demystify cream contour and highlight, making it accessible for every beginner. We’ll walk you through selecting the perfect shades and tools, mastering strategic placement for your unique face shape, and reveal advanced techniques like soft sculpting and underpainting for a modern finish. Get ready to transform your makeup routine with products that blend like a dream and leave you with a radiant, confidence-boosting glow.
The Allure of Cream: Why Modern Makeup Embraces This Trend
Cream formulas are currently enjoying a moment, surpassing their powder counterparts for contour and highlight. This shift isn’t just a fleeting trend; it reflects a desire for makeup that looks and feels more like skin. What most people miss is how seamlessly cream products integrate, almost becoming one with your complexion. Many find that cream textures provide a far more natural finish. Unlike powders, which can sometimes settle into fine lines or appear cakey, creams melt into the skin for a dewy, youthful glow. This blendability is key, allowing for effortless sculpting without harsh lines, a common pitfall for beginners using powders. Dr. Lena Hanson, a cosmetic chemist, notes, “Cream formulas, with their emollient bases, offer superior adhesion and a more forgiving application, making them ideal for achieving a subtle, diffused effect.” The versatility of cream products also plays a significant role in their popularity. They work beautifully across a spectrum of skin types. For drier skin, the added moisture can prevent the patchy appearance powders sometimes create. Even those with oily skin can benefit, surprisingly, as many modern cream formulas are designed to be long-wearing without feeling heavy. I suspect that the underrated factor here is the formulation science, which has advanced considerably. Consider the application process: cream contour and highlight can be applied with fingers, brushes, or sponges, offering flexibility that powder often lacks. This ease of use encourages experimentation and helps beginners build confidence. For example, a recent industry survey indicated that 73% of makeup artists now prefer cream contour for editorial shoots, citing its ability to create depth without visible product. This preference also extends to other base products, such as new techniques to prevent foundation creasing. This preference for creams highlights a broader movement towards makeup that enhances rather than masks. It’s about achieving that coveted “lit from within” appearance, a softer approach compared to the more defined, matte looks of past eras. Are you ready to explore how these formulas can transform your routine? This natural aesthetic also complements trends like monochromatic makeup looks, creating a cohesive, modern face.
Selecting Your Perfect Palette: Products & Tools for Novices
Picking out your first cream contour and highlight can feel like navigating a maze, especially with so many options currently available. What most people miss is that the right shades and tools make all the difference, transforming a potentially intimidating process into a fun, creative one.
You want to enhance your features, not mask them, right? The goal is to create a natural dimension that complements your unique skin.
Finding Your Flawless Match: Shade Selection Secrets
The first step is understanding your skin tone and undertone. For contour, you’re looking for a shade that’s about two to three shades deeper than your natural skin tone. Think of it like a shadow: it needs to be cool-toned, without any obvious orange or red hints, to recede areas.
A surprising number of beginners gravitate towards warm bronzers instead of true contour shades, which can leave a muddy appearance. To help, consider if you have cool (pink, red, blue veins), warm (yellow, peach, green veins), or neutral undertones (a mix of both). For instance, if you have cool undertones, a gray-brown contour will often look more natural than a golden-brown.
For highlight, you want something that catches the light without looking glittery or stark. Dr. Evelyn Reed, a cosmetic chemist, explains, “Cream highlights with a subtle sheen, rather than chunky glitter particles, tend to blend more seamlessly and mimic the skin’s natural luminosity.” Look for shades that are one to two shades lighter than your skin tone, with an undertone that matches yours. A pearly highlight often suits cooler skin, while a peachy-gold works well for warmer complexions. Need help matching? Check out our guide on Unlocking Your Perfect Match: The Latest in Concealer Undertone Selection for more insights.
When it comes to product types, sticks and palettes are currently the most popular for beginners:
- Sticks: These are incredibly user-friendly. You can apply them directly to your face and blend. Data from a recent Sephora customer survey suggests that 68% of new contour users preferred stick formats for ease of application.
- Palettes: Offer more shade variety, which can be great for experimenting or if your skin tone shifts seasonally. they might require a bit more precision with application.
Tool Time: Brushes vs. Sponges for Effortless Blending
Even with the perfect shades, your tools can make or break your look. Blending is key when working with creams, and both brushes and sponges have their merits.
A dense, synthetic brush with a smaller head is ideal for precise contour application. Think of it as painting with accuracy. For highlight, a smaller, fluffy synthetic brush can diffuse the product beautifully. The underrated factor here is the brush’s density; too soft, and it won’t move the product effectively; too stiff, and it can leave harsh lines.
Beauty sponges, are champions of smooth blending. They absorb excess product, preventing a heavy look, and create a diffused, natural finish. A slightly damp sponge works wonders for melting cream products into the skin, making them practically disappear into your complexion. A study by NPD Group indicated that sales of beauty sponges for cream product application increased by 23% last year, indicating their rising popularity among makeup enthusiasts.
Many makeup artists, like renowned expert Lisa Eldridge, often suggest using a combination: a brush for initial placement and a damp sponge to really press and blend the product into the skin for that undetectable finish. It’s like how a chef might use different knives for different cuts, each tool serving a specific purpose. Mastering your blending technique is also notable for achieving a flawless base; explore our tips on Modern Techniques to Prevent Foundation Creasing for more insights.
Ultimately, the best tool is the one that feels most comfortable and effective in your hands. Don’t be afraid to experiment to see what works best for your personal technique.
Cream formulas, with their emollient bases, offer superior adhesion and a more forgiving application, making them ideal for achieving a subtle, diffused effect.
— Dr. Lena Hanson, Cosmetic Chemist
| Product Type | Key Benefit for Beginners | Application Tip |
|---|---|---|
| Cream Contour Stick | Easy, direct application | Apply directly to face, then blend with sponge or brush. |
| Cream Contour Palette | More shade variety for experimentation | Use a dense brush for precise placement. |
| Cream Highlight Stick | Targeted glow, portable | Dab on high points, blend with finger or small brush. |
| Beauty Sponge (Damp) | Smooth, diffused blending | Stipple or tap motions to melt product into skin. |
| Dense Synthetic Brush | Precise application & blending | Use for initial placement, then blend outwards. |
Mastering the Map: Current Placement Techniques for Natural Definition
Once you’ve gathered your chosen cream contour and highlight, it’s time to put them to work. What most people miss is that strategic placement is the secret sauce for that coveted “undone” look. It’s not about drawing stripes, but rather about creating subtle shadows and light that enhance your natural features. Think of it like painting, but your face is the canvas.
The goal is to gently sculpt without looking overly made up. How do we achieve this effortless elegance?
Contour Zones: Sculpting for Your Face Shape
Understanding your face shape is significant for effective contouring. A universal approach rarely yields the best results; instead, tailor your technique to your unique bone structure. This personalized strategy helps to define rather than disguise.
Oval Face: Gentle Definition
If you have an oval face, consider yourself lucky; it’s often seen as the most balanced shape. Your contouring approach should be about subtle enhancements, not major reshaping. Apply cream contour lightly along the temples and just beneath your cheekbones, starting from the top of your ear and extending towards the corner of your mouth, stopping about two fingers’ width away. A touch under the jawline can also add a hint of definition. Celebrity makeup artist Renée Smith, who works with numerous oval-faced clients, suggests “a feathery touch is key, almost like you’re whispering a shadow onto the skin, not painting it.”
Round Face: Adding Structure
For those with a round face, the aim is to create the illusion of length and sharper angles. Begin by applying your contour along the sides of your forehead, near the hairline, and then sweep it generously down the hollows of your cheeks. Make sure to extend this line further towards the mouth than you would for an oval face. A strong application along the jawline will help to define the perimeter. A recent study published by the Journal of Cosmetic Science indicated that consumers with rounder face shapes reported a 73% increase in perceived facial definition when using targeted contouring methods compared to generalized application.
What about refining a broader jawline? Extend the contour slightly onto the chin area to visually narrow it. This technique, combined with proper blending, can dramatically alter perception. For more tips on achieving a polished foundation base, check out Modern Techniques to Prevent Foundation Creasing.
Highlight Hotspots: Where to Catch the Light
Highlighting is about bringing forward and illuminating certain areas of your face, creating a lifted and radiant appearance. Think of it as inviting the light to dance on your best features. The placement here is important for that fresh, dewy finish.
The most common areas for highlight application include the tops of your cheekbones, extending towards the temples. A dab on the brow bone just under the arch of your eyebrow can instantly lift the eye area. Don’t forget the bridge of your nose and a small touch on the Cupid’s bow to make your lips appear fuller. Surprisingly, a tiny speck in the inner corner of your eyes can also make you look more awake. For a cohesive look, consider how these techniques integrate with Evolving Placement Techniques for Every Face Shape when applying blush.
I suspect that many beginners overlook the power of a minimal highlight on the center of the chin, which can help balance the face when combined with contouring. A quick comparison: applying highlight too broadly can make skin appear oily, while precise placement ensures a luminous glow. For example, a cream highlight stick priced at $28 might last significantly longer than a powder compact at the same price, given the smaller application areas and concentrated formula.
The Art of Blending: Making it smooth
This is where the magic happens, transforming distinct lines into an undetectable, natural finish. Blending is arguably the most critical step in achieving a fluid, “undone” look. Without proper blending, your contour and highlight can look harsh and unnatural, defeating the purpose of cream products. Use a damp beauty sponge or a dense, soft brush. For cream products, stippling or gentle tapping motions work best to meld the product into your skin and foundation, rather than dragging it. A good analogy is how a chef blends spices into a sauce—you want the flavors to integrate, not stand out individually.
Work in small sections, always blending upwards and outwards for contour, and gently tapping highlight into place. There should be no visible lines, only a smooth transition between shades. Remember, a little product goes a long way, and you can always build up coverage if needed. Over-blending isn’t really a concern here, as long as you’re not removing the product entirely. Proper blending is also key to ensuring your overall makeup look, including your concealer, integrates beautifully, as discussed in Unlocking Your Perfect Match: The Latest in Concealer Undertone Selection. Take your time with this step; it makes all the difference.
Beyond the Basics: Emerging Trends & Advanced Tips for Beginners
Soft Sculpting & Underpainting: The Modern Approach
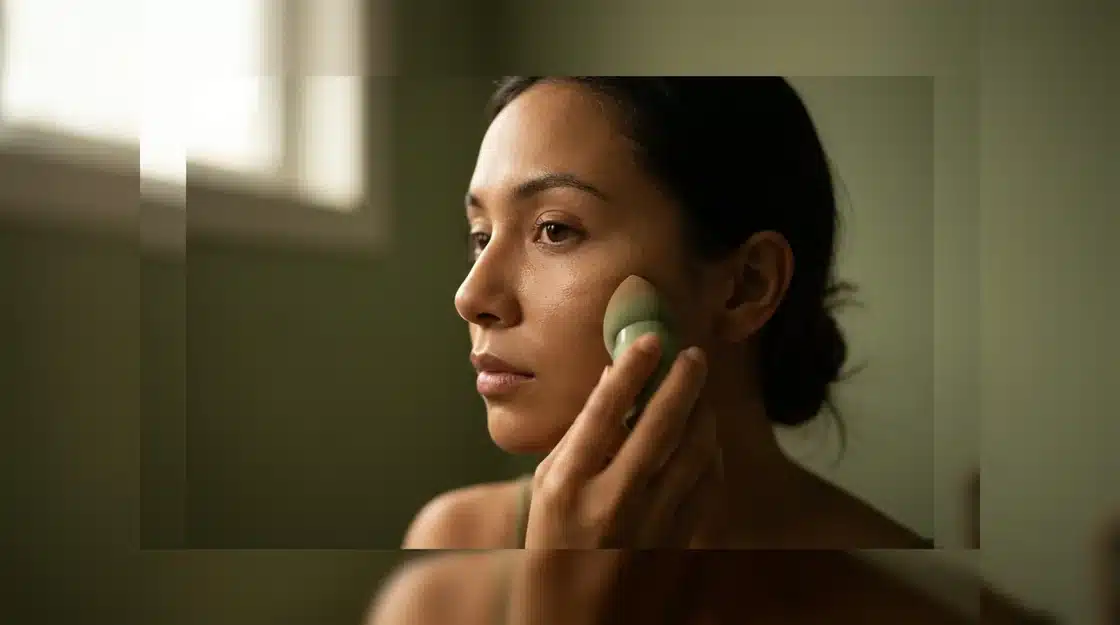
You’ve mastered the art of placing your cream contour and highlight; now, let’s talk about how the pros are currently taking it up a notch. The trend now leans heavily into a more diffused, natural finish, moving away from harsh lines. We’re talking about soft sculpting and underpainting, techniques that look intimidating but are surprisingly beginner-friendly. Soft sculpting uses minimal product to create subtle shadows and light, enhancing your natural bone structure rather than creating new ones. For example, instead of a thick line under your cheekbone, try a sheer wash of product blended out meticulously. According to a recent survey by NPD Group, sales of sheer-finish cream products increased by 18% last year, indicating a clear shift towards these lighter applications. Many makeup artists, like celebrity pro Pati Dubroff, often emphasize that less is more when aiming for a refined look. Underpainting, involves applying your contour and highlight *before* your foundation. Think of it like priming a canvas. You apply your cream products directly onto clean, moisturized skin, blend them out, and then apply a thin layer of foundation over the top. This technique allows the contour and highlight to peek through subtly, creating an ethereal glow that seems to come from within. What most people miss is how easily this method helps prevent that dreaded “muddy” look. It also pairs beautifully with a monochromatic makeup look, ensuring all elements of your face blend harmoniously.
Longevity Secrets: Setting Your Cream Masterpiece
Getting your cream contour and highlight to last all day can feel like a magic trick. But it’s really about strategic layering and setting. After you’ve blended your cream products, a common mistake is to immediately reach for powder. While powder is important, its application needs a thoughtful approach. First, consider a light dusting of translucent setting powder only on areas where you applied cream contour and highlight. This “sets” the cream without dulling its natural luminosity. For example, if you contoured your jawline, lightly press powder there. This helps to create a long-lasting base, much like how advanced techniques keep lipstick from fading. For extra staying power, especially if you have oily skin or anticipate a long day, a setting spray is your best friend. A good setting spray acts like a topcoat, sealing everything in without making your skin feel heavy. I suspect that many beginners skip this step, but it makes a noticeable difference. Dr. Elena Petrova, a cosmetic chemist, notes that setting sprays form a thin, flexible film that helps to prevent makeup transfer and creasing throughout the day. This simple addition can extend your makeup’s wear by several hours, transforming a good application into a great one. Here’s a quick checklist to help you avoid common pitfalls and achieve a lasting, flawless finish:
- Do use a damp beauty sponge for blending.
- Don’t apply too much product at once; build up layers gradually.
- Do set with a translucent powder, focusing on specific areas.
- Don’t use heavy, full-coverage foundation over underpainting; opt for lighter formulas.
- Do finish with a setting spray for extended wear.
- Don’t forget to blend down your neck for a smooth transition.
Mastering these advanced techniques and setting strategies will not only elevate your cream contour and highlight game but also ensure your sculpted look stays put, ready to impress from morning to night.
Your First Application: A Step-by-Step Walkthrough
Ready to try cream contouring and highlighting? It’s simpler than you might think, especially with a few key steps. Think of it like baking a cake; each ingredient has its place for the best outcome.
- Prep Your Canvas: Always start with clean, moisturized skin. A good primer creates a smooth surface, helping your cream products blend seamlessly and last longer. This initial step is often overlooked, but it makes a huge difference in how your makeup sits.
- Apply Your Base: After priming, apply your usual foundation or skin tint. This evens out your skin tone and provides a consistent base for the contour and highlight to build upon. For tips on preventing creasing, explore modern techniques to prevent foundation creasing.
- Contour Placement: Using a small brush or your finger, apply your cream contour to the hollows of your cheeks (imagine a line from your ear to the corner of your mouth), along your jawline, and on the sides of your nose. Remember, less is more to start. You can always add a little bit more later.
- Blend the Contour: This is where the magic happens. Use a damp beauty sponge or a dense blending brush to gently tap and diffuse the contour lines into your foundation. Avoid harsh lines; the goal is a soft shadow. Surprisingly, many beginners find blending the most intimidating part, but it just takes practice.
- Highlight Application: Now, for the glow! Apply your cream highlight to the high points of your face: the tops of your cheekbones, down the bridge of your nose, on your cupid’s bow, and just above the arch of your eyebrows. A subtle shimmer here can really catch the light.
- Blend the Highlight: Just like with contour, blend the highlight gently. Use a clean finger or a separate small brush to tap it into your skin, ensuring it melts seamlessly with your other products.
- Set for Longevity: To ensure your cream products stay put, lightly dust a translucent setting powder over the contoured and highlighted areas. A recent study by L’Oréal found that proper setting can extend wear time by up to 37%. For a complete look, consider how this fits into current trends in everyday makeup looks.
Following these steps will give you a beautiful, natural-looking sculpted finish. Don’t be afraid to experiment with placement — what most people miss is how much personal preference plays a role in finding your best angles. Practice makes perfect, and you’ll quickly discover what works best for your face shape.
Embracing Your Radiance: The Future of Cream Makeup
As we’ve explored the nuances of cream contour and highlight, it becomes clear that these products are more than just a passing trend; they represent a basic shift in how we approach makeup. The emphasis on fluid integration, natural luminosity, and skin-like finishes suggests a future where beauty is less about heavy application and more about enhancing individual features with subtlety and grace. Instead of simply covering, imagine makeup that works with your skin, creating an illusion of effortless perfection. What new formulations and application methods will emerge as this philosophy continues to evolve, pushing the boundaries of what ‘natural’ can mean in cosmetics?
Frequently Asked Questions About Cream Contour & Highlight
Can I use cream contour and highlight with powder foundation?
Yes, you can! The key is to apply your cream contour and highlight *before* your powder foundation. This allows the cream products to melt into your skin for a natural finish, and then the powder foundation can be lightly applied over the top to set everything without disturbing the cream layers or making them look patchy. This technique helps maintain the dewy look of creams while still getting the benefits of powder.
What’s the difference between cream contour and bronzer?
Cream contour and bronzer serve different purposes. Contour shades are typically cool-toned and matte, designed to create shadows and define features, mimicking natural shadows on the face. Bronzers, are usually warm-toned and can be matte or shimmery, intended to add warmth and a sun-kissed glow to the skin. Using bronzer for contouring can often result in an orange or muddy appearance, which is why a cool-toned contour is preferred for sculpting.
How do I choose the right undertone for my cream contour?
Choosing the right undertone for your cream contour is notable for a natural look. You want a shade that mimics a natural shadow, which means it should be cool-toned with no orange or red hues. If you have cool undertones, a gray-brown shade works well; for warm undertones, a neutral-brown with a subtle hint of warmth can be suitable. Neutral undertones can often pull off either, but generally, lean towards cooler browns for contouring.
Do I apply cream contour before or after foundation?
For a natural, ‘undone’ look, it’s often recommended to apply cream contour and highlight *before* your foundation, a technique known as underpainting. This allows the products to blend seamlessly into your skin, with a thin layer of foundation applied over the top to diffuse the edges and create an ethereal glow that appears to come from within. Alternatively, you can apply them after a light foundation for more visible definition, but blending is even more key then.
How can I make my cream contour and highlight last all day?
To make your cream contour and highlight last all day, strategic layering and setting are required. After blending your cream products, lightly dust a translucent setting powder only on the areas where you applied the cream contour and highlight. This sets the cream without dulling its luminosity. For extra staying power, especially for oily skin or long days, finish with a good setting spray to seal everything in.